How to Clone a Cannabis Plant? It’s Easier Than You Think
Every legendary mother plant begins with a simple cut, a steady hand, and the right propagation tools.
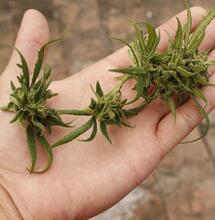
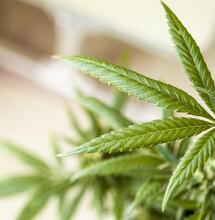
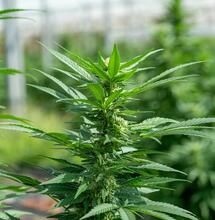
Whether you are a commercial cultivator or a passionate home grower, there is a point in every garden’s life cycle where you encounter the perfect phenotype. Perhaps it is a specific cut of Orange Haze or Lemon Cherries that boasts an unparalleled terpene profile, exceptional pest resistance, or massive resin production. When you find a genetic masterpiece, you do not want to lose it after harvest.
While growing cannabis from seed is an excellent way to introduce variation and tap into hybrid vigor, cloning is the ultimate method for preserving high-quality genetics.
Cloning allows you to create an exact genetic replica—a twin—of your favorite “mother” plant. The process is cost-effective, time-saving, and highly reliable once you master the foundational biology behind taking a clean cutting.
The Science Behind Cloning
Cannabis plants possess totipotent cells, meaning that a cell taken from a vegetative branch has the genetic blueprint required to completely reprogram itself and regenerate an entirely new root system.
When you take a cutting from a vegetative mother plant, you are bypassing the unpredictable genetic lottery of seed germination.
Every clone carries the same genetic blueprint as the mother plant and will generally exhibit the same or similar growth patterns, flowering times, and cannabinoid potential when grown under comparable conditions.
This uniformity is vital for managing an even canopy and optimizing yields.
Essential Tools for a Sterile Toolkit
Before making your first cut, you must assemble a sterile toolkit. The number one cause of cloning failure is localized bacterial or fungal infection at the wound site.
- Sterile Cutting Tools: A brand-new scalpel, single-use razor blade, or high-grade trimming shears.
- Rooting Medium: Pre-formed peat plugs, rockwool cubes, or a dedicated automated aeroponic cloning bucket. Rockwool is highly favored for its exceptional water retention and internal air-to-moisture ratio.
- Rooting Hormone: A specialized gel, liquid, or powder containing synthetic plant auxins (typically Indole-3-butyric acid or IBA). Auxins signal the plant’s cells to stop producing foliage and start forming roots.
- Environmental Enclosure: A standard seedling tray equipped with a clear plastic humidity dome.
- Sterilization Fluid: 70% Isopropyl alcohol to constantly sanitize your blades and work surface.
The rooting medium plays a major role in cloning success. Materials such as rockwool, peat plugs, coco coir, and aeroponic systems help provide the moisture and oxygen young cuttings need to develop healthy roots.
Step-by-Step Guide to Taking Perfect Cuttings
Here’s how to proceed for a successful cannabis cloning effort.
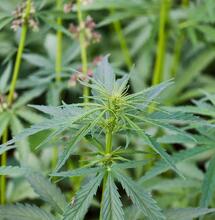
1. Preparing the Mother Plant
Select a mother plant that is healthy, pest-free, and firmly fixed in the vegetative growth stage (18/6 light cycle). Don’t take clones from a flowering plant, as forcing a cutting to revert from bloom back to veg (re-vegging) causes severe genetic stress and mutant leaf growth. Stop or reduce feeding the mother plant heavy nutrients or nitrogen fertilizers two to three days before cloning; you want the plant to have lower nitrogen levels, which coaxes the cutting into prioritizing root development rather than vegetative leaf growth.
2. Selecting and Making the Cut
Look for strong, vibrant, lower branches with at least 2 to 3 distinct nodes.
- The First Trim: Sever the chosen branch from the mother plant cleanly, making the cut just above a node on the main stalk.
- The 45-Degree Angle Cut: Submerge the base of the severed branch in a small cup of clean water. Under water, use your sterile scalpel to make a precise 45-degree angle cut just below the lowest node of your cutting. Making the final cut under water minimizes the possibility of air entering the plant’s vascular system (the xylem), which can cause wilting and tissue death. The 45-degree angle maximizes the surface area available for new root initiation.
3. Applying Hormone and Siting the Clone
One recommendation is to gently scrape the outer layer of the stem’s skin (the epidermis) at the very base of the cutting to expose additional rooting tissue. Then, dip the prepared stem directly into your rooting hormone gel, ensuring the bottom node is completely coated. The gel seals the open plant tissue and delivers concentrated auxins directly to the cells. Insert the treated stem firmly into a pre-soaked rockwool or peat plug.
4. Grooming the Foliage
To maximize your clone’s survival rate, you need to reduce its metabolic workload.
- Fan Leaf Trim: Snip off the lower fan leaves entirely.
- Leaf-Tip Clipping: Use your shears to cut the tips of the remaining upper fan leaves in half. This classic technique prevents the leaves from overlapping and trapping stagnant moisture, limits transpiration (water loss), and forces the plant to channel its limited energy away from photosynthesis and directly into underground root production.
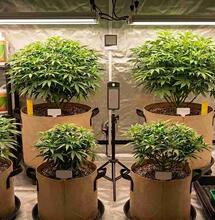
Environmental Controls: Light, Humidity, and Monitoring
Because a fresh clone has zero roots, it cannot absorb water from its medium. It relies entirely on absorbing ambient moisture through its leaves.
- Humidity: Keep your clones under a clear plastic dome. Maintain relative humidity (RH) at 75% to 85% for the first 1-3 days, and gradually reduce afterward. Mist the inside of the dome regularly with clean, pH-balanced water. Gradual venting can begin after day five to introduce the clones to ambient room air.
- Temperature: Maintain a consistent root zone temperature between 74°F and 78°F (23°C–25°C). Utilizing a waterproof seedling heat mat beneath your tray will accelerate cellular division and root emergence.
- Lighting: Clones do not want intense, high-powered grow lights. Intense lighting will stress the foliage. Instead, utilize low-intensity white LEDs, T5 fluorescent tubes, or soft CFL lighting set to an 18/6 or 20/4 photoperiod.
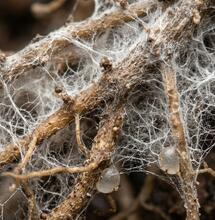
Root Emergence and Transplanting
Within 10 to 14 days, you should observe vibrant, bright white root tips beginning to burst through the sides and bottom of your rooting plugs.
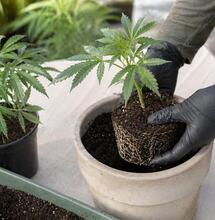
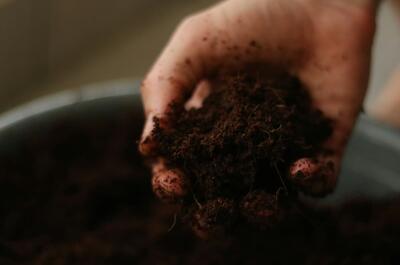
Once the primary roots extend roughly an inch past the medium, your clones are officially self-sustaining plants. Prepare small pots filled with pre-moistened, well-aerated organic soil or coco coir. Make a small indentation in the center, insert the rooted plug gently to avoid breaking the delicate root hairs, press the medium lightly around the base, and water thoroughly.
By mastering these basic steps of clean, climate-controlled cloning, you can preserve your absolute favorite cannabis plant varieties, stabilize your perpetual harvest garden, and maintain genetic consistency year after year.
Read more from Soft Secrets:
Disclaimer: Cannabis cultivation laws vary by region. Readers are advised to check and comply with the regulations applicable in their local jurisdiction before cultivating cannabis.
S
Soft Secrets