How to Roll the Perfect Joint for Beginners
Today there are various ways and methods how to consume cannabis and get high. Some of these things didn't even exist just five or ten years ago. You can vape, use a glass pipe, eat gummies, dab very potent extracts, or microdose with tinctures, and the list keeps growing every year as new cannabis products are being introduced to the market. Nevertheless, flower remains one of the most popular options for users out there as well as knowing how to roll a joint still is an essential stoner skill. In this article, we will cover basic techniques for rolling a joint, including a few extra tricks that will help you roll perfect joints for every occasion!
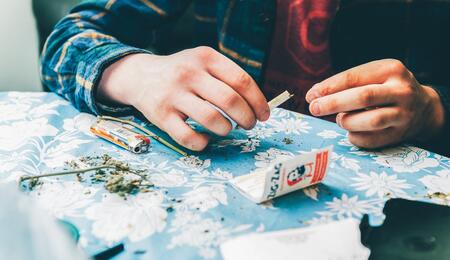
Everyone remembers their first times getting high. Also, everyone remembers their first time rolling a joint: fat bellies, bad paper tips, too strong, too weak, a crumb of weed catapults into your throat, your eyes turn red, and you almost choke to death. While rolling a joint might look like a bit of a complicated process at first, practice makes it perfect. Below are step-by-step instructions for beginners on how to roll a perfect joint!
Step 1: Prepare to Roll, Prepare the Weed
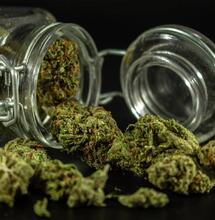
Before you actually roll a joint, you need to prepare a few things so that everything goes smoothly. You don't need a lot of stuff to begin rolling, however. All you need is paper, a filter, and some weed. Pretty simple, right?
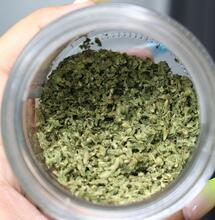
Now, when it comes to preparing your weed, this is something you can do with your bare hands. It may take a couple of minutes to shred the chunk of weed into tiny crumbs. It can be more difficult if the chunk is wet or condensed, or very easy if it's more on the dry side. You can also do this with the help of small scissors, or, as many regular users prefer - you can use a grinder.
Preparing the weed with a grinder is very easy. You put the amount of weed you like, say, half a gram, which is more than sufficient for a solid joint. Ideally, you want to aim for a somewhat rougher grind. Don't reduce your chunk to sand, as that will make the joint hard to smoke and less likely to give you a good high. It's always good to check the progress after a couple of twists and see if it's well done or needs another twist.
Step 2: Prepare a Filter
Filters are also known as crutches or tips. This piece of the joint enables you to smoke more of your flower rather than a roach that cannot be smoked. It also helps fight the resin that clogs the end of the joint. So, a good filter is as essential as weed done well with the grinder.
You can resource your filter from various stuff. Anything that's a thin cardboard-like paper. When you buy rolling papers, a pack usually comes with paper tips, too. Roll the card up thick enough to match the width of the joint you intend to roll after folding it into an accordion (basically, fold it into a W, then spiral).
Some users don't use a filter, however, a filter prevents scooby snacks and makes the joint fixed and easier to smoke. For newbies, it's more than recommended to use a filter, as it also prevents cough.
Step 3: Fill the Joint with Weed
Once you are done with preparing the weed and the filter, you can proceed with rolling. Place the paper tip at one end of the joint. Hold the paper at the filter end with one of your hands, and use the other hand to form the joint by moving around the crumbs of weed. You want that the weed is evenly distributed across the paper. The plant material also must be the same width as the filter. Take the time to shape the joint properly. If you spoil the paper, you can dismantle it and start again with a new paper. Try and try until the filling looks decent.
Step 4: Pack, Roll, Lick & Seal
The weed content in the paper is even with the filter. It's time to roll it up. Pinch the paper between your fingertips and gently roll back and forth to pack the cannabis down. After a few such rolls, tuck the unglued side of your paper into the roll, lick the glued edge of the paper, then roll quickly and down to hold into place.
Always start rolling from the filter end first, it's way easier. Work your way down the rest of the joint, tucking and sealing the piece. It's also important to note not to wait too much after you lick the glued side of the paper. The saliva might dry and the joint may not seal in this case.
Step 5: Giving the Final Touches
You have successfully rolled and sealed your joint. Anything else you need to do? There's one more step to ensure it will burn nice and smooth. Take a pen or pencil and gently tap the weed through the top of the joint. You can also lightly tap the joint on a surface, filter side down. This additionally helps pack the weed inside the paper as it closes any minuscule pockets of air. Finally, seal the filling by twisting the paper at the open end.

Rolling a Joint with a Roller
There's always the joint roller when it feels like you have two left hands for rolling a joint. The roller is a pretty helpful apparatus. It holds the paper for you as you place it in the opening, and you can roll freely without obstructions. But first, you have to fill the machine chamber with filter and weed.
Same as doing by hand, the content of the chamber should be evenly distributed and has the same width as the filter. Ensure that the chamber is not crammed with weed as otherwise, it will result in a joint that is too tight to smoke. Once the "ingredients" are in place, close the filling and do a few rolls without the paper. That will help the weed to pack nicely. Finally, insert the rolling paper in the opening of the roller, glue side up. After you lick the paper, quickly roll down and continue to roll gently until the paper disappears into the void. Don't press too hard to avoid flattening the joint.
Have fun!
S
Stephen Andrews