How to Germinate Cannabis Seeds

Germinating cannabis seeds is the brew day of the garden. It’s where the craft begins. If you enjoy dialing in yeast temps or picking the right hop blend, you’ll feel right at home here. Bringing a seed to life takes care, patience, and good timing. Think of it like starting a small batch IPA. The details matter. Here’s a simple guide to help you get started.
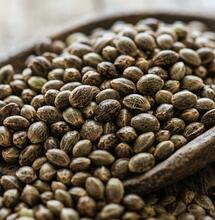
Know Your “Ingredients” (Seed Selection)
Before you do anything, start with good seeds. You wouldn’t brew with stale grain, and you shouldn’t plant mystery “bag seeds” either. Quality genetics makes the whole process smoother. If you want to better understand how different cultivars are related before choosing what to grow, resources like Strain Ancestry can help you explore cannabis lineage, parent strains, and genetic backgrounds.
Companies like Rocket Seeds focus on stable, high-quality cannabis seeds. That means better germination rates and fewer surprises later on. You don’t need the most expensive option, but you do want seeds from a trusted source.
Here are a few common types:
- Autoflower Seeds: If we were to liken these seeds to styles of beer, they’re the “session beers” of the grow world. They flower based on age, not light cycles. That makes them simple and beginner-friendly.
- Feminized Seeds: These grow into female plants, which produce the buds most growers want. This saves you from raising male plants that won’t yield usable flowers.
A Note on Washington Law: In Washington State, home growing is mainly allowed for medical patients. However, cannabis seeds are federally legal to buy and possess as hemp, as long as they contain less than 0.3% THC.
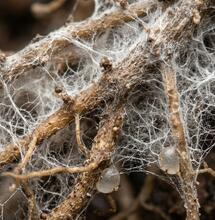
The Paper Towel Method (The Standard Batch)
This is the most reliable way to germinate seeds at home. It gives you control, like making a yeast starter before brew day.
- Sanitize: Wash your hands or wear gloves. Young taproots are delicate, and contamination can ruin them.
- Moisten: Wet two thick paper towels with pH-balanced water (aim for 6.0 to 6.5). They should feel like a wrung-out sponge. Not dripping.
- Place the Seeds: Set the seeds on one towel with space between them. Cover with the second towel.
- Incubate: Place the towels between two plates to create a dark, humid space.
- Keep It Warm: Aim for 75 to 80°F. A warm spot on top of the fridge works well. If it’s too cold, the seeds may stall. In 1 to 3 days, you should see a small white tail. That’s the taproot.
The Shot Glass Soak (The Rapid Start)
If your seeds have a hard shell, try soaking them in a glass of room-temperature distilled water for 12 to 24 hours. This can help “wake them up.”
Don’t leave them soaking longer than 24 hours. Seeds need oxygen too. Once you see the shell crack or a small taproot appear, move them to soil or the paper towel method.
Planting the “Pitch”
When the taproot reaches about half an inch, it’s time to plant.
- Use Light Soil: Choose a seedling mix or light, airy soil. Heavy fertilizers can burn young roots.
- Plant Shallow: Make a hole about half an inch deep. That’s about the first knuckle of your pinky.
- Taproot Down: Place the seed taproot facing down.
- Cover Gently: Lightly cover with soil. Don’t press it down. The sprout needs room to push through.
Troubleshooting: Why Won’t They Pop?
- Too Much Water: Soil should be damp, not swampy. Too much moisture can cause fungal issues like damping off.
- Too Cold: If temps drop below 70°F, germination slows down or stops.
- Too Deep: Planting too deep can drain the seed’s energy before it reaches light.
Patience Pays Off
Germination usually takes 3 to 7 days. During that time, think of it like waiting for fermentation to kick in. You want to check on it, but you don’t want to interfere too much.
Keep the environment clean, warm, and steady. Don’t overwater. Don’t overhandle. If you’ve set things up the right way, the seed will do what it’s designed to do. With a little patience, you’ll see that first sprout break through the soil, and that’s when the real growing begins.
S
Soft Secrets