Sponsored
Harvesting, Drying and Curing your Cannabis
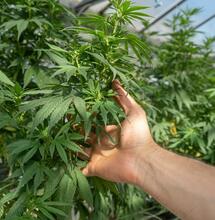
This video is all about drying and curing your cannabis. Finally, after three months, your plants are ready for harvest, all your hard work has finally paid off, and now you reap the benefits.
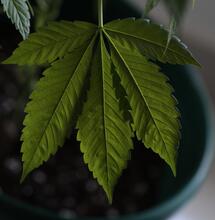
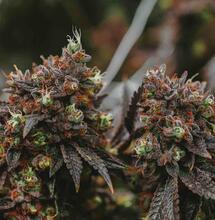
Firstly, you must ask yourself how you know these plants are ready. Looking at them, you can see that the plants have used up most of their nutrients and now have some dark purple hues on their leaves. Your plants will also have been showing visible flowers for roughly eight weeks, which is quite a typical full length of time for cannabis to mature fully.
To be 100% sure, you can use a magnifying glass or attachment from RQS, like the one Drew uses in the video, to get a good look at those frosty trichomes. You should see that the majority have turned milky/cloudy, with about 10\5 turning a shade of amber. This signifies the perfect time for harvest.
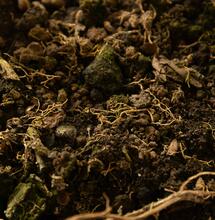
To make harvesting more manageable, the first thing to do is to remove any of the large fan leaves on your plants and then remove the trellis netting. Next, use a good sharp pair of garden snips and cut the whole plant off at the base. There are several ways to dry and trim your plants, which come down to personal preference. Still, this is the perfect way for beginners to get to the task. Drying the plant one piece helps slow the drying making for a better, more even finished product.
After cutting down all four, hang them upside down with your ratchet hangers that hold your lights in your tent. You may need to bring a humidifier or dehumidifier into the tent to get conditions where they need to be for optimum drying time. On either side, you want to keep your tent at about 60% relative humidity, give or take 5%. Do this, and you can be sure of a well-dried crop.
It would help if you kept an oscillating fan on to circulate the air, but not directly aimed at your plants and the exhaust fan on but at its lowest level. Now there is nothing left to do but close your tent and allow your plants to dry in complete darkness. Check on every few days. After 7-10 days, it's time to assess whether your plants are ready for trimming.
To check, bend a branch on one of the plants upwards. If you hear a nice clean snap, but the branch does not entirely break away from the rest of the plant, you should be at the point where the plant is dried enough to start trimming.
Cut each big branch off the plant one by one to get started trimming. Now take each branch and cut a small branch off. Then, with clean trimming scissors, work on that small branch, shaving off all the leaves and stalks as close to the bud as possible to give a nice, neat appearance.
|once you have finished trimming, it may feel very tempting to smoke some of your buds but hang on because now we need to cure it. Smoking them before curing will feel quite harsh on the throat, and there may be a grassier aroma than the signature cannabis smell that you would expect.
Curing is easy; get a few glass mason jars with an airtight seal. Fill each jar ¾ of the way, seal, and keep them in the dark, cool place for 2-4 weeks. Open the pots every few days and
shake the bud around so that it all gets good air circulation. This is why it is important not to fill the jar, as your bud needs space to move and breathe. Keeping the jars in a dark place is essential as sunlight can degrade THC, making your buds less potent. You will notice the smell change as the curing period goes on; after about a week, your weed will begin to give you more of that dank, potent "weed" smell that is instantly recognisable.
After four weeks, your weed is ready! But this is not the end of our journey; in the following video, we will be looking at a typical day in the life of a Canadian countryside cannabis farmer, so stay tuned for that. If you want to view any previous videos in the series, you can find them on the soft secrets youtube channel.
S
Soft Secrets