Sponsored
The Perfect Grow, Ep. 9: Harvest, Drying & Curing
Welcome back to “The Perfect Grow” video tutorials, a learning place where every enthusiast cannabis grower can get valuable tips and advice on how to grow their own cannabis medicine at home. In the ninth installment of the series, our dear friend and pro grower Drew Anger explains the final steps of the cannabis grow process. Check out this episode and see how to proceed with harvesting and trimming the buds from your plants, and how to properly dry and cure before finally sitting down for a smoke.
How Do We Know Cannabis is Ready for Harvest?
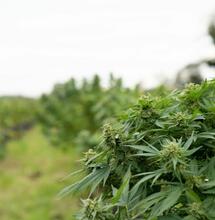
All good things come to an end. Starting from seed and nurturing the cannabis plants through every phase of their lifecycle brings us to the most rewarding part: reaping the benefits of all that hard labor.
It takes around three months before cannabis plants are ready to harvest. By this time, plants have used up a lot of their nutrients. They can have some very dark purple leaves. They have also been showing visible flowers for about eight weeks. Meaning they won’t last too much longer in this state.
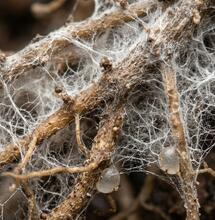
If you want to be absolutely sure if the plants are ready to harvest, you can use a magnifying glass to get a really close-up view of the trichomes. The trichomes need to be pretty milky or cloudy white and about 10 percent of them being amber. This is a great indicator that it’s the perfect time to proceed with harvest.
As you prepare for harvest, trim down and pinch some fan leaves that are not needed. Remove the trellis netting or any other support system you might have used for the plants. Free from support, the plants can be cut down one by one. Cut right at the base of the plant.
How to Hang and Dry the Plants?
There are bunch of different ways to dry cannabis plants. It’s really up to a matter of preference. For example, you can dry the plant as a whole plant, as a one piece. This would slow down the drying process, but it will allow the stems to move some nutrients that were not removed yet.
As you cut down the plants, hang them each upside down in the grow tent. You can do one final cleaning at this time. Pinch any remaining leaves that you don’t need, before leaving the plants rafted in the middle of the tent.
During drying, it’s important to keep a relative humidity at around 60 percent in the tent. That’s the ideal level, although plus or minus five is also okay. With this humidity, the plants can hang in there for quite a long period of time without having to worry a bit.
Keep the ventilation on low setting. Lights off so that the plants dry in total darkness. The oscillator fan can also work in the tent, but you don’t want it blowing directly on the plants.
In the beginning, you can check the plants every day or so. And after around ten days, you can start periodically checking them to see if they are dry enough for trimming yet.
Simple test to determine if they are dry enough? Just take one branch of one of the plants and bend it up to see if there will be a snap sound. The sound will indicate whether the plant is properly dry or needs more time. If there is not much of a snap or it’s a really quiet sound, the plant is likely still too wet. If the snap is clean and there’s dust, that’s definitely too dry and you should use the humidifier and try to improve the humidity level. It takes a few grows to dial this in.
How to Trim Buds Once the Plants Are Dry?
This is the part that a lot of growers find it to be the most satisfying. Because it’s finally revealing the beautiful buds. How you go about with this final trim is again up to you. You can do shaggier buds or you can go with more dense buds. Both would make a good smoke anyway.
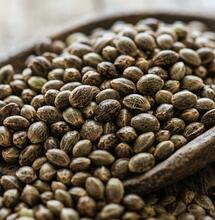
It takes around two hours of cutting to get all the buds. Of course, the yield will very much depend on the strain you are growing. For this project, we cultivated Wedding Gelato (see the episode where we pick the seed). Four plants of this strain could give around 300 grams of fully finished buds. Not a huge yielder so getting 75 grams from each plant is right on par with expectations. You can double or triple this number with other strains that are known to yield more.
At this stage when you have all the buds ready, it takes all of your power not to smoke any of it. Because there’s still one more important step to complete. Curing the buds!
How to Cure Buds?
A lot of growers sometimes skip this step, however, smoking buds before they are properly cured results in a pretty harsh smoke. That’s why we do curing. To avoid harsh and have a pleasant, smooth smoking experience in the end.
Curing is the easiest part of the entire grow process. It’s what improves the taste and flavor of weed. All you have to do is put the buds in a glass jar. Keep them in dark place for another two to four weeks. During the first week, you can open up the jar every day for about half an hour. In the next weeks, open them twice a week.
The slow exchange of air when you open the jars allows the buds to metabolize any remaining nutrients; they soften and become more suitable for a smoke. Even during the first week of curing you will begin to notice a huge difference in smell, shifting from green fresh odor to a really dank, potent reefer smell.
Watch the full video on our YouTube channel
“The Perfect Grow” series was brought to you by Soft Secrets in collaboration with Royal Queen Seeds and other familiar names from the cannabis sector.
Explore more from the series on the links below:
S
Soft Secrets