The Perfect Grow Ep. 4: How to Germinate Cannabis Seeds

Growing cannabis is one of those things where there are hundreds of ways to do every single task and nothing is specifically the right way. As you grow cannabis, there are a lot of things that can go wrong, and the first thing on that list is germinating cannabis seeds. In the fourth episode of Soft Secret’s The Perfect Grow online series, grow expert Drew Anger shares how to germinate cannabis seeds. He also gives some extra advice that you can use to avoid making some common mistakes that might kill your seeds.
Equipment Needed for Germinating Cannabis Seeds;
- Cannabis seeds (if you want to grow four plants, it’s good to have at least eight seeds in stock)
- A couple of styrofoam plates
- Some roller paper towels
- Chlorine-free water
- Small cans/plastic cups to transplant the sprouting plants
- Additional equipment (such as germination tray and a dome to cover the seedlings)
The First Steps of Germinating Cannabis Seeds
Now that we've picked the seeds we wish to grow in the previous episode, it's time to germinate them! First, grab a couple of styrofoam plates and some roller paper towels. Layer out the paper towel to be three or four layers thick and just wet it down with normal tap water. If you suspect that there’s chlorine in the tap water, let the water sit in for about 24 hours before you use it on the cannabis seeds, otherwise it might damage or even kill them. Alternatively, you can use bottled water or distilled water for this.

Squeeze any excess water from the paper towel. You can still leave it pretty wet, just make sure it’s not dripping. Then you can just gently set the seeds on the paper towel. Have the seeds laid in a styrofoam plate and cover them with another piece of wet paper towel. To complete this step, sandwich the tray of germinating cannabis seeds with another styrofoam plate and store it in a dark area with a normal room temperature. It will take about three or four days until all the seeds have germinated.
While you are germinating cannabis seeds, check on them everyday to see if there has been any progress. Also make sure that the paper towels are staying damp. After a few days, you should be seeing some progress. Some of the seeds might have small roots that are two or three centimeters long. If there are some seeds that haven’t germinated yet that’s fine too. Some of the seeds take a little bit longer and some seeds might never germinate at all. That’s just the way nature works. This is important to know because if you, for example, want to grow four cannabis plants at home, it’s wise to try and germinate about eight seeds in this initial step of the growing process.
How to Transplant the Germinated Cannabis Seeds?
Once you have germinating cannabis seeds with tap roots that are at least a centimeter long, you can plant them in your grow medium. Use small containers to fit the seedlings as the first few weeks you really don’t know if you are having a viable plant or not. Which, again, is why it’s good to have some extra to use as replacement if needed in your grow room.
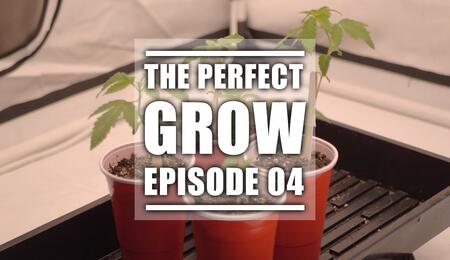
A regular plastic cup is the perfect size container that you can use to accommodate the small sprouting plants at this time. Fill the pot with soil and poke a little hole in the middle of it. If you want you can add a little bit of mycorrhiza, a natural fungal spores solution that aids the growth of roots, that a lot of people use for young fragile plants. In the video, Drew uses mycorrhiza from Royal Queen Seeds.
Once the medium is prepared, take one of your sprouting seeds and place it into the hole with the tap root facing down. Then fill the hole with soil, burying the seed down about a centimeter. Give it just a little water to wet the surface around the soil where the seed is. You really don’t need a lot of water because you don’t want to drench the whole medium, as overwatering can drastically slow down your early growth, or any stage of growth for that matter.
How to Keep the Small Containers?
When you are done with transplanting the seedlings, place the containers in a germination tray and cover them with a high dome that is sprayed with water. This will keep a humid environment for the young plants inside. Keep them closed like that for the first week and then gradually start to let some fresh air in.
Keep the tray in the grow tent where the lights are set to about 30 percent power. When the plants are this young, they really don’t need a ton of lights to get going. In fact, if you put the lights at maximum power, you’re probably going to end up burning the plants. You can also put the tray on a little raiser. This makes sure that when the floor beneath is cold, it doesn’t cool down the soil and thus inhibit the growth of your plants.
When between 24 and 48 hours have passed, the seeds should start breaking through the surface. Over the next few days, just make sure that the environment inside the dome remains nice and humid. You might need to add a little more water on the soil every couple of days. Also, don’t forget to start ventilating. When the time comes to take off the dome completely, the growth process will speed up. The bigger the plants get, the faster they’ll start growing, and at some point, they will need to be transplanted to bigger pots.
Be sure to watch the full video below! Due to an age restriction the video can only be played on YouTube.


