The Life Cycle Of A Cannabis Plant
As a new grower and cannabis enthusiast, finding out the hard way about growing is not so much fun, as it costs you time, money, resources and countless hours scrolling through irrelevant online forums full of misinformation. When you can fully understand the life cycle of a plant and how it truly functions, then growing stage by stage is much easier and the chances of having a quality crop are much higher. Below is covered everything you need to know as a beginner grower and how to have a better hands on experience with your plants. By Stoney Tark / Photos courtesy of Dinafem


 Natural Plant Growth Regulators: It is very important to know that there are chemical changes that will occur within the plant, as it develops through the different stages that are covered below. Quickly explained is each natural hormone and what its role is in relationship to the growing cycle. You may have heard of commercial nutrient growing with PGR nutrients and these are frowned upon by the cannabis community as they as not natural whatsoever. Below is a list of the natural growth enhancing regulators that the plant produces on its own.
Auxin Stimulates cell elongation and growth, functions in phototropism and gravitropism. Auxin is the most well known growth hormone and is responsible for thriving bushy plants in veg.
Cytokinins Affects root growth, stimulates cell division Gibberellins Promotes seed germination, stem and leaf growth, and root development. Naturally found in seaweed which contains natural growth hormones, it can be used to treat stubborn seeds as it creates a reaction between the seed shell and the root cap.
Brassinosteroids: Inhibits root growth and is most prevalent during the flowering stage.
Abscisic Acid :Promotes dormancy, closes stoma when under stress and is also responsible for the development of lateral root growth.
Ethylene Responds to stress, promotes fruit ripening and is what is used in supermarkets to spray display fruit.
Natural Plant Growth Regulators: It is very important to know that there are chemical changes that will occur within the plant, as it develops through the different stages that are covered below. Quickly explained is each natural hormone and what its role is in relationship to the growing cycle. You may have heard of commercial nutrient growing with PGR nutrients and these are frowned upon by the cannabis community as they as not natural whatsoever. Below is a list of the natural growth enhancing regulators that the plant produces on its own.
Auxin Stimulates cell elongation and growth, functions in phototropism and gravitropism. Auxin is the most well known growth hormone and is responsible for thriving bushy plants in veg.
Cytokinins Affects root growth, stimulates cell division Gibberellins Promotes seed germination, stem and leaf growth, and root development. Naturally found in seaweed which contains natural growth hormones, it can be used to treat stubborn seeds as it creates a reaction between the seed shell and the root cap.
Brassinosteroids: Inhibits root growth and is most prevalent during the flowering stage.
Abscisic Acid :Promotes dormancy, closes stoma when under stress and is also responsible for the development of lateral root growth.
Ethylene Responds to stress, promotes fruit ripening and is what is used in supermarkets to spray display fruit.
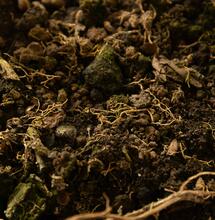
Seedlings
This is where it all begins and now you have been reading everything there is know about your seeds, you can now begin to germinate and prepare their new homes. There are a few things you will need to consider at this very important stage and they are the medium, temperatures and lighting. As precious and delicate as seedlings are, they are the start to your target yield and flowers, so making sure they have ambient temperature of 24 degrees celsius and the humidity is around 75%. The reason is because this must imitate the wet and warm months of spring, so keeping the seedlings in this environment is fundamental to the growth of the root and leaves. One thing you do not want to do is to have a light that is too intense for the seedlings. I would personally recommend using a H.I.D or L.E.D light but keeping the seedlings at least a few feet away. Alternately you can get very close with fluorescent lighting at 6400k white light spectrum. This is the stage where your plants will grow and form their first set of leaves and then begin to grow a few inches taller with a very thin main stem. Here you will want the light cycle to be 18/6 or 20/4 and allow the plants to have some darkness.The Veg Stage
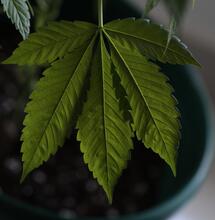
Here you will still want to keep your timers on the 18/6 mark and allow the plant to grow with long days and shorter nights as they do towards May, June and July naturally outdoors. Your humidity can remain the same around the 75% mark. Now is the time you will want to introduce some type of intense lighting. A 600w or 1000w H.P.S will reward you will well grown lush plants. As far as you are concerned as a new grower, the way to calculate the difference between the seedling stage and veg stage is quite simple. The day the seedlings recieve 18/6 this counts as the vegging period. There is a period that the plant once the lighting is switched to 12/12, will enter called the pre flowering stage. Also referred to as the stretch and the part that most inexperienced growers can become overwhelmed by.Pre Flowering Stage
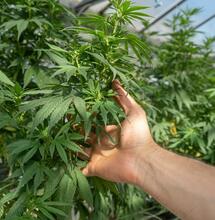
This is the part where your plants will grow upwards as tall as they can as they are induced with natural growth regulators. If you were growing from regular seeds, then between the first 10 days is when you would get an indication of which plants are male and which are female. If you are growing from feminised seed then you will see white pistils emerging from the internodes. This is the part where you will need to start training the plants to perform better, as well as pruning, topping, tying down, fimming, super cropping and trellising. As the plant continues to grow a good idea to focus on the remaining upper growth, by stripping away as clones or throw to waste, all of the lowest parts beneath the plant, literally leaving only the top 2-3 internodes of every branch. Once the plant has finished stretching and has established itself in flowering mode, it will focus on producing new leaves, shoots and flower sets and a growing pattern that is more horizontal than vertical. Your humidity now will need to change towards the 35% mark which is a 50% reduction than in the growing stage. I would advise if possible to adjust the humidity over the pre flowering stage from 75% to 55% then to 35% and you will find this is the most natural transformation.Blooming
This is technically around the 15th day of 12/12 where the plants will begin to produce flower sets. The actual flowering stage did commence once the plants entered a hormonal change and sent signals to grow upwards and begin blooming. Personally I class week 3 as the start of the blooming stage but that is me personally. This is also where a lot of growers can make the mistake of jumping from one NPK ratio to another at the switch of a light cycle. I prefer to transition feed so keep feeding my grow feed at 7-8-8 upto around week three and will transition to a heavy feed that is around 3-10-10. Your humidity should be around 35% and this will also prevent any mould or powdery mildew as long as the airflow is adequate and is considered more dry than wet. If you have an indica strain of cannabis or a skunk variety that can finish in 50 days, then that means the plant has around 4 weeks or actually producing squeezable terpy flowers. Sativa strains of cannabis can take upto 77-84 days to fully finish, so this is almost a 10 week blooming stage. So if you're looking for bigger yields, then statistically a sativa strain is almost twice the blooming period of an indica. My tip here would be to find a strain is that a hybrid of an indica and sativa, whilst truly expressing this through hybrid vigour. This way as a new grower you can enjoy the powerful stone of the indica cross and the large yielding lengthened flowering times of the sativa.End Of Cycle And Flushing
Referring to the last stage of the cannabis plants life, where by now it has spent all that time and energy working hard, converting light and nutrients and providing you with some high grade flowers. As a new grower here it is essential to learn that the end of cycle stage can be the make or break. The reason why you are growing cannabis plants in the first place is to grow for commercial value perhaps a coffee shop or social club scenario, or it may be it is your head stash or for medicinal use. Whatever the reason is you want to have to clean crisp aromatic flowers that really pack an organic punch. When you are flushing your plants you are not just watering them with plain water for their enjoyment, the point is to allow the water to break down those undissolved salts. As a result the salts break down and the plants will drink up every last nutrient until the point of displaying what is called seasonal colours. The plants will begin to purple and orange and a multitude of assorted hues and pinks. This is my favourite stage of the entire grow, not just because of the timing but as a breeder it gives me an opportunity to see how each strain really finishes under the optimal conditions. One of the best pieces of advice I can offer is to leave your plants for a week longer than any calendar or diary states you should harvest. Even if every hair is brown and the calyx are totally stacked, you should always wait until the point of pure ripeness and maturity. This practice would be expected in the wine industry or any commercial sector that operates with fruit and veg. Not only will this ensure your buds are the most potent they can be, it is also the stage when the plant will communicate the most with seasonal colours and releasing terpenes.
Other Things To Know As A Beginner
Photoperiodism: Cannabis plants like humans have a body clock in which they live by. This means they will react to different spectrums and different nutrients, throughout the life cycle. This will become dictated by natural growth regulators and be difference in the plant becoming a mature vibrant plant and finishing its cycle. To keep it simple this just means longer periods of light will keep the plant in one state with certain requirements, whilst shorter periods of light will change the plants uptake of red light. This process is done through what is called phytochrome, which is what the plant uses as a living sensors to light spectrum and darkness.
Natural Plant Growth Regulators: It is very important to know that there are chemical changes that will occur within the plant, as it develops through the different stages that are covered below. Quickly explained is each natural hormone and what its role is in relationship to the growing cycle. You may have heard of commercial nutrient growing with PGR nutrients and these are frowned upon by the cannabis community as they as not natural whatsoever. Below is a list of the natural growth enhancing regulators that the plant produces on its own.
Auxin Stimulates cell elongation and growth, functions in phototropism and gravitropism. Auxin is the most well known growth hormone and is responsible for thriving bushy plants in veg.
Cytokinins Affects root growth, stimulates cell division Gibberellins Promotes seed germination, stem and leaf growth, and root development. Naturally found in seaweed which contains natural growth hormones, it can be used to treat stubborn seeds as it creates a reaction between the seed shell and the root cap.
Brassinosteroids: Inhibits root growth and is most prevalent during the flowering stage.
Abscisic Acid :Promotes dormancy, closes stoma when under stress and is also responsible for the development of lateral root growth.
Ethylene Responds to stress, promotes fruit ripening and is what is used in supermarkets to spray display fruit.
Sources Of Environmental Stress And Tips
For a new grower getting caught up in the propaganda of stressing plants, so believe every slight amount of trauma will result in an unwanted hermaphrodite. This is not true and in fact there are five types of stress that the cannabis plant will in fact react to accordingly, in the way it seeds best.Dry Spells And Droughts
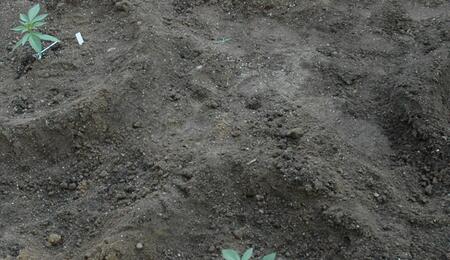
Otherwise called a drought, this can be seen as a form of mild stress of at least allowing the plants roots to air out, prune, push for nutrients and expand in structure. However, a medium that has suffered from a dry period for a substantial amount of time, will ultimately have a negative effect on the growth of the plant. Also this will be sure to kill any beneficial bacteria or fungus that has been harboring in the medium and growing a complex molecular network within the medium and the root cells. An unpredictable dry patch can sometimes occur from nowhere especially if growing outdoors in a hot climate during summer months. A good tip here is to attach a dripper line to your plants that runs off a small fish tank pump, attached to a res. If you are jubious about adding thick organic nutrients in, then you can just fill the res with only plain water. Then hand feed with the nutrient solution until you are comfortable with adding your feed through a dripper system. This eliminates the concern of there ever being a dry period longer than you desired, whilst only feeding the plants for example 2 times a day at fifteen minute intervals.Over Watering And Flooding
A waterlogged medium is never a good thing and with many variables to consider, an unaerated well drained medium, is only asking for unwanted sulphur smelling aerobic bacteria to thrive. If you are a new grower and have noticed even though the plant may look great, there is a foul egg like odor coming from the tops and the base of the pots you are growing in. If you were to pull the roots out, under closer inspection you will notice that they are not white and hairy, more brown and thin and clustered into the soggy medium. A good tip that I would recommend to all new organic growers is to select a medium that has the ability to really dry itself out, as well as we air rich and full of air pockets. Add 50% of perlite to your mixture next time and if you are worried it may occur again, throw a few inches of perlite at the base of the pots, so now this keep the soil and direct water source touching one another. One thing that growers underestimate is that root hairs require air as just as much as they do water. This is why a deep water culture set up produces enormous roots as the plant is able to obtain so much oxygen. Of course it is different with organic growing but dry spells are good.Salt Stress And Nutrient Lock
This is the most common mistake that growers unintentionally make in the garden, even though they ensure all of the other variables are in place. When you do not understand why the plant has started to yellow or why there are now brown dots on the tips of the leaves, or why the leaves are all burnt at the end, this is down to salt stress or what is called nutrient lock out. When organic growers are pouring nutrients, they can rely on a natural buffering zone that works in their favour, however once this is misunderstood by the over zealous bedroom grower who wants 1kg per plant. This results in a crop that looks deficient and burnt out. A tip here is to always ensure that the amount of nutrient solution you make is the guided amount, that the nutrient companies advise. By adding more nutrients will not make the plants perform better and it is also a good idea to feed with schedules such as feed plain water every third day or every second day, yet ensure that the plants have water to act as a solvent to break down the remaining left over salts.Heat Stress
As a new grower you may have battled with heat control and also seen the adverse effects it has on the plant. Temperatures in the garden that exceed 30 degrees celsius will begin to have a dramatic effect on the humidity and the umount of carbon dioxide the plant can uptake, in comparison to light and nutrient uptake. When the garden gets hot dealing with those burning H.I.D lights and ballasts, hot stagnant air quickly builds up and can begin to dry the plant out to a point of burnt tops and crisp yellow leaves. A good tip is to make sure that the intake and outtake fans are able to remove the old air from inside the tent at a good speed. You will want new air being pushed in at the base of your tent by an intake fan as the old fans suck the old air out. Make sure that the out take fan has a bigger capacity than the intake fan, so the idea is that you will create a vacuum chamber that is constantly recycling the air out the tent at least 20 times per hour.Cold Temperatures
Naturally the only time an outdoor plant would feel cold temperatures are towards the end of harvest, as winter creeps up and the air becomes more chilly. As a new grower you are able to control the grow room to be 24 degrees with a relative humidity of 70-75%. This is the ideal temperature and at night time your grow room should experience a drop of around 4-6 degrees celsius. If your plants are experiencing cold spots, you will find that the root zone has slowed down a great deal and the medium will not dry out as quickly as it once did before. You may notice the plants have now began to stunt in growth and the buds that you have spent so long maintaining are growing very slowly with little structure and size. Not only this you are beginning to notice there is white powdery mildew forming on the leaves and the buds. A good tip here is keep the temperature above 18 degrees even if this is the best you can achieve with the lights on or off. Adding a heat mat or a heater with fan s blowing around, will eliminate the opportunity for mildew or mould to enter the garden and attack the buds and plants. If your medium is cold to the touch then try raising the pots off the cold floors and try growing in future in felt fabric pots as these will keep the medium warmer.
S
Soft Secrets