How To Make Your Own (Regular) Seeds - A 10 Step Guide
We have all grown from seeds before and seen how incredible nature can be, when creating a wonderful plant from a seedling. These seeds can be a time capsule of the best genetics that covers the earliest strains to the modern day feminised genetics.
Whilst each cannabis strain expresses the genetics that represent that part of the planet, the beauty of creation is only a sprinkle of pollen a way. Here breeding is explained in a 10 step guide and to how to create your own evolutionary gems as this article covers how to produce regular seeds.
STEP 1: Selecting The Characteristics You Want
Before starting any breeding project, you will want to have a good understanding of what characteristics you want to create. You should also ask yourself for what main reason do you want to create a new strain. It could be that you have a limited supply of genetics that you wish to expand beyond the thousands, or you want to beef up a super frosty stinking plant that yields low. You may want to improve a classic strain that you have had in clone form for years, or maybe just cross it with something that geographically is from the opposite side of the world.
STEP 2: Decide What The Dominant Genetics Will Be
This simply means that choosing which genetic the male plant will come from. The male plants should always possess the characteristics you wish to add to another. So for example if you wanted to make a fruity sativa taste more potent and crossed it with a kush, the male plant should be the kush to increase the characteristics. If the male plant in this instance was the sativa, then the kush would be watered down in a sense.
STEP 3: Plant Many Seeds And Catalogue
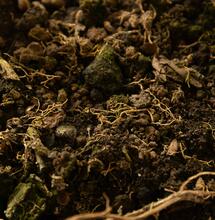
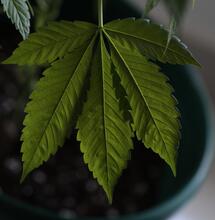
The most successful way to produce true diversity when creating a strain, is working with many possible selections of seeds. If you are making a simple back cross then it is still advised to grow enough to find that perfect male and to also have a good ratio of male and female plants. When you number the seeds you simply need to write for example ‘ Kosher Kush # 1 ‘ until you have around 10 of these and then the same with another strain for example ‘ Girl Scout Jones #1 ‘. If you do not label your pots from day 1 then this will only cause more problems further down the line. During the entire growing period of the seedlings, you should be taking notes on paper and documenting the size, vigour, aroma, growth pattern and root growth of the seedlings. You will want to be taking clones at some point to have a living copy of the catalogued plants, which may be discarded later down the line depending on what your intentions are with the other plants that did not make the final selection.
STEP 4: Discovering The Sex And Finding The Keepers
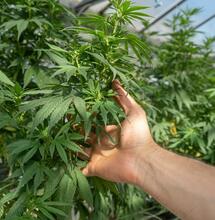
By the growing stage you will have a better idea of which strains stand out as keepers, in terms of vigour and stature. Once you have taken clones for livestock purposes and have labelled according, then you need to flower the plants and discover which are male and female. This is the most exciting time as a breeder and finding the best male and female of the bunch is what breeding is all about. You will be able to tell the male plants as they naturally appear a few weeks earlier than female flowers. The reason is to help them better synchronize with successful pollinating times so the pollen has a chance to interact with female flowers early on. Male plants will have small ball shaped flowers in a cluster whilst female flowers will look like a blade of grass with a tiny white hair protruding from the inside. When you have decided which of the plants you will select for the final pollination, then now you must isolate the two in an environment where the pollen can interact will the female flowers, without jeopardizing any other flowering rooms you may have.
STEP 5: Inside The Flowering Room
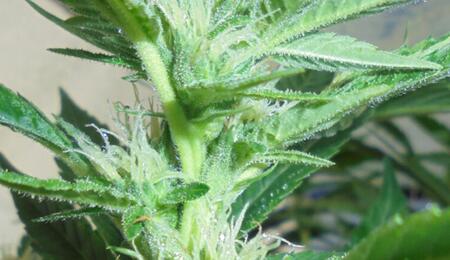
In this scenario you will want to have the chosen male and female in the same grow tent. As you flower the plants the male flowers will begin to form, as the female pre flowers will begin growing multiple white hairs. The best time to pollinate the female is when the flowers are around 2.5 weeks old, as this gives around 6 weeks to produce ripe healthy seeds. The male flowers will open like miniature claws that will look like small bright yellow bananas, after the third to fourth week. Under closer inspection it will appear there are a bunch of the miniature bananas hanging off each male flower. These will open on their own accord and when they do you will know as the tiny pollen sacks become dry and produce a light yellow fine powder. It does not take a lot of pollen to successfully pollinate an entire plant so here you have a chance to collect the pollen in parchment paper, label and keep stored away in a dry place.
STEP 6: Successful Pollination And Instant Brown Pistils
By this stage the pollen will have naturally transferred to the female pistils and you will notice, that all all of the previous bright white pistils are now brown and red coloured. This means the pollen has now travelled inside the flower and what was a smokable calyx, will now swell into a seedling. If you are pollinating by hand then a simple wave of a male dusty flower will do the job and only performing this once is needed to make the initial pollination. This is how easy nature does it and when you get to this stage, your main priority now is to ensure there is enough time to allow for every single seed to harden off and become ripe. At this point the male plant can be taken away from the room and discarded, as long as you have taken a clone or collected pollen for the later stages of stabilizing. You can begin a 6 week counting period now and watch as the plant swells with pip formations all over. As the seeds begin to swell, you will notice the outer layer of the calyx begin to reveal the developing seeds inside. As long as there is adequate food and lighting as if you were feeding any other flowering cannabis plant, then you can count on harvesting all of the seeds within the 6 week time frame.
STEP 7: Checking The Seeds For Ripeness
As you find the harvest date getting closer then you can begin to check the seeds to see how far they are from completion. Some seeds will appear light green and almost white and these ones are still way undeveloped, whilst good quality seeds will be hard to the touch, tiger striped or patterned and have matured to a nice golden brown shine. When you know the seeds are strong viable seeds they can be harvested and shaken out of their pouches onto a clean surface where they can be cleaned up, labelled and stored for testing.
STEP 8: Labelling The Seeds Correctly And Storing Away
Once you have harvested the seeds and have your collection, you need to keep them dry and in a dark place away from sunlight and moisture. The reason why is to prevent them from entering the germination state so darkness and a bottom wooden draw will be fine. Label the plants correctly with the male and females used, so for example ‘ Male Kosher Kush # 9 x Female Strawberry Cough # 2 First Generation Regular Seeds ‘. By this stage you will want to have collected some pollen and have a living clone of the male and female you used. If not this is not the end of the world but limits how you can stabilize the line with the exact same father from the new first generation seeds.
STEP 9: Testing The First Generation Seeds
This is the stage you have waited for so to see how those seeds germinate or do not germinate can be tense. If you have followed the steps correctly then the seedlings should look as professional as they do from the major seed banks, and they should be hard to crush with a good sturdiness. The best way to test the seeds is to drop a handful in a glass of warm water, then place in a cupboard in the dark. Every day check on them and give them a friendly swirl and replace the water each day. After 24 to 72 hours, your first generation seedlings will germinate with fat white tails and a splitting shell. For the sake of testing, I always like to grow many small plants and see what the general characteristics are like and how much variation there is. When you have tested the seeds and they all germinate and grow well, you can compare notes and see how this line you have created has improved from their parental lineage. You will notice different phenotypes and depending on how happy you are with the level of stability, it can be recommended at this stage to stabilize using the original male pollen.
STEP 10: Stabilizing the line
At this point it is a good idea to pollinate a female from the first generation seeds and stabilize the line to create a second generation line of seeds. If you have some of the stored original male pollen in parchment paper then this can save the entire process of having a male in the grow room, as well as ensure that the male being used is the same as the first. This ensures that the plants will grow as uniform as possible with little variation and extended hybrid vigour. The second generation of seeds that will be produced are called F2’s and should be labelled and stored as for example ‘ Kosher Kush # 9 Male x F1 # 3 Female Regular Second Generation Seeds ‘. This process can continue until a fourth and fifth generation exist, however you will often find after the third generation, the plants are totally dialled in and possess the hybrid vigour that you set out to create in the first place. Things To Consider:
What Are The Differences Between Regular Seeds And Feminized Seeds?
The general difference in terms of the grower is that that the feminized seeds, have been bred to produce only female plants. The advantages of this are you can have a room full of female plants without the need for selecting males and females. This also means that every single pot will have a plant growing and hydro systems can rest assured that there will be no empty spaces throughout their hydro systems after removing males. When actually producing your own female seeds, it is a little bit more tricky than crossing a male and female plant in synchronicity with one another. Colloidal silver is needed and used to activate a female flower into a male flower. This sounds very unnatural and because of this many growers have a strict preference to working with regular or feminized seeds.
How Much Pollen Do I need And How Many Seeds Will I Make?
Under a microscope pollen vibrates and never stops moving until it has found a viable host. A small quantity of pollen for example a gram of dry powdered pollen, could easily pollinate an entire room of flowering females, producing thousands and thousands of seeds. When an entire male plant flowers, this can wipe out crops if the plan is to not create seeds and there is a myth floating around, that the original Jamaican Lambs Bread was pollinated to the point of no return by another landrace growing locally. It is a good idea if you are being delicate with pollinating a lower branch only to use a small paint brush and dip it into a small jar of the labelled pollen.
What If The Pollen Gets Wet?
If the pollen gets wet it can make the pollen useless and inactive, so do as good job of keeping the stored pollen as dry as possible. Using a small wooden box to keep the parchment inside is a good idea or even something as simple as an empty match box for storage.
My Seeds Are Not Germinating Well And The Plants Are Mutated
This can happen and there can a number of things that can go wrong, as these not only cover germination problems but mutated plants growing with 3 or 4 leaves at a time, plants that slow down growth after a few weeks and seedlings that grow with thin weak characteristics and collapse on themselves and never recover.. If this problem occurs then this batch of seeds should be thrown away as every seed will be a genetic match to some degree. It would be easier to try all over again and this time use a different male or female and see if the quality improves from the new lineage of seeds. Nature intends for evolution to occur and when plants struggle to perform well, then this can be natures way to say try again and know that those world famous crosses you have spent your life pursuing came from the same step by step process above. Peace Out and good luck creating your very own customised cannabis strain! By: Stoney Tark
S
Soft Secrets