Guide to Hempy Buckets
Hempy buckets took off in the US and Canada a few years ago—and for good reason. This simple growing method is ideal for cultivators looking to produce large, vigorous cannabis plants without expensive gear or complicated setups. Cheap to build, easy to maintain, and surprisingly effective, hempy buckets punch well above their weight. In this article, you’ll find everything you need to know to decide if this low-tech approach is right for your grow.
What is a Hempy Bucket?
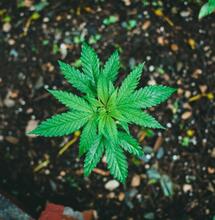
The “Hempy Bucket” remains one of the most legendary “life hacks” in the cannabis cultivation world. Originally popularized by a grower named Hempy, this system is a simplified form of passive hydroponics. Unlike complex setups with pumps, timers, and reservoirs, the Hempy Bucket works via a combination of capillary action (wicking) and root growth into the reservoir to deliver nutrients to your plants.
Why Choose Hempy Buckets in 2026?
In an era of expensive high-tech grow gear, the Hempy Bucket stands out for its simplicity. It is:
- Inexpensive: You can build one for under $10 using a standard 5-gallon bucket.
- Reliable: No power outages or pump failures to worry about.
- High Yield: It provides the rapid growth of hydroponics with the ease of soil growing.
What You Will Need
- A Bucket: Traditionally a 5-gallon (approx. 20L) plastic bucket.
- Growing Medium: The classic “Hempy Mix” is 3 parts Perlite to 1 part Vermiculite. For modern growers, a 70/30 Coco Coir and Perlite mix also works exceptionally well.
- Nutrients: Since this is a soilless medium, you must use hydroponic-specific nutrients (e.g., General Hydroponics Flora Series or similar).
- Tools: A power drill and a 1/2-inch drill bit.
Step-by-Step Build Guide
- The Drainage Hole (Crucial): Measure 2 inches (5cm) up from the bottom of the bucket. Drill a single hole here. This creates a 2-inch “reservoir” at the bottom of the bucket where the nutrient solution will sit.
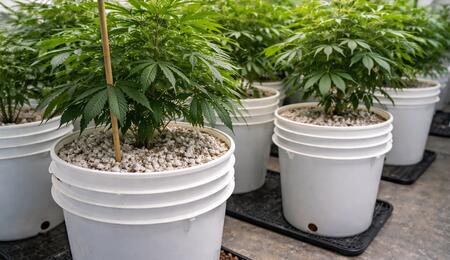
- Filling the Reservoir: Fill the bucket with pure perlite until you are just above the drainage hole. This ensures the bottom reservoir doesn’t hold “muddy” medium.
- Filling the Rest: Fill the remainder of the bucket with your 3:1 Perlite/Vermiculite mix.
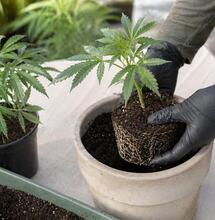
- Planting: Transplant your seedling or clone into the bucket.
- Initial Watering: Water with a light nutrient solution until it begins to drain out of the hole.
Feeding and Maintenance
The secret to the Hempy Bucket is the reservoir. You don’t need to water every day. Once the plant’s roots reach the bottom (the “reservoir zone”), you will notice a massive explosion in growth.
- Watering Frequency: In the US market, where grow rooms can get hot, you’ll typically water every 2–3 days. Though, early veg still requires more often than that.
- The Overflow Rule: Always water until about 20% of the solution flows out of the drainage hole. This flushes out old salts and prevents nutrient lockout. It might sound aggressive to some growers, but it’s one of the best practices.
FAQ: Is the Hempy Bucket Right for You?
Who are Hempy Buckets best for?
- Beginner Growers: If you are just starting out, the Hempy Bucket simplifies feeding. The built-in reservoir turns watering into a 2–3 times a week task rather than a daily chore, allowing you to focus on mastering environment basics like lighting and airflow.
- The “Nervous” Over-Waterer: Many home growers kill their plants with kindness by watering too often. Hempy Buckets are ideal because the drainage hole and reservoir system make it almost impossible to over-water if you stick to a 3-day schedule.
- Growers on a Budget: You don’t need expensive automated systems. All you need are a few 5-gallon buckets, Perlite, and Vermiculite. It’s often cheaper than buying high-quality soil and smart pots, yet the yields are typically higher.
- Small Plant Counts, Big Yields: In many US states, plant counts are limited by law. Hempy Buckets allow you to grow “trees” rather than small bushes, helping you maximize your legal limit.
Can I use organic nutrients in a Hempy Bucket? It is highly recommended to use a quality mineral-based hydroponic nutrient. Because the nutrient solution sits in a still reservoir, organic nutrients can spoil or become anaerobic quickly since there is no pump to oxygenate the water. Mineral feeds keep the system clean and stable.
What is the best growing medium to start with? To avoid transplant shock and keep the system clean, start your seeds or clones in a hydroponic medium like Rockwool, Coco, or a Perlite/Vermiculite mix. While you can use sponge starter cubes (like Root Riots), avoid using heavy soil starters to keep the reservoir from clogging.
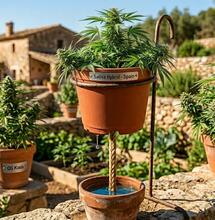
How do I manage the size of the plants? Plants in Hempy Buckets—especially in 5-gallon (20L) sizes or larger—can get massive. Plan your grow space accordingly. We recommend investing in bamboo stakes, plant yoyos, or Scrog nets early on to support the heavy buds that this system produces.
How do I keep the grow room clean? Since you must water until you see 20% runoff to prevent salt buildup, it is essential to place your buckets in large saucers or a heavy-duty flood tray to catch the excess nutrient solution.
Happy Growing!
More from Soft Secrets:
Disclaimer: This guide is for informational purposes only. Cannabis laws vary significantly by state (e.g., California vs. Idaho). Always consult your local regulations and the 2018 Farm Bill regarding hemp-derived products. This content does not substitute for professional legal or medical advice.
S
Soft Secrets