Seeding your Growth

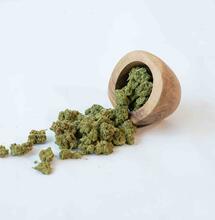
Cannabis seeds are the starting point for all the growing we do.
Cannabis seeds are the starting point for all the growing we do.
|
The seed shell will fall off naturally as it grows |
Cannabis seeds are the starting point for all the growing we do. Even if your mother plant has many years of cuttings under her belt, she came from a perfect little packaged embryo. Finding a supply of seeds in a desired strain, choosing the healthiest ones and keeping them stored safely are an important part of breeding.
First off, when you get a bag from a dealer that has a bunch of seeds in it don’t get excited unless you know the grower has male plants around. This is the definitive difference from ‘good’ bag seeds and ‘bad’ bag seeds. Not many growers tackle the breeding side of things with male plants and many only grow feminized seeds. This only leaves one thing to create those seeds your finding in the bag, hermaphrodites. Female plants can turn into a hermaphrodite plant and produce seeds from its own flowers. This can be genetically predetermined or happen from excessive stress on the plant during its growing cycle. This sexual breeding mishap usually produces seeds that are going to be genetically predetermined to also hermaphrodite. But you won’t know this however until your beautiful nugs are rittled with seeds at the end of the flower stage. You can take your chances if you wish to roll the dice, but instead of adding to this sexual deviancy cycle I tend to stay away from ‘bag’ seeds.
|
A healthy seed will be glossy, plump and have a solid shell that is brown in color with striation patterns |
The most popular seed shopping happens through online seed banks, and with so many different companies to choose from make sure you always use a reputable company, with good reviews. These companies take precautions to get you seeds delivered discretely and safely and usually will not send you anything but the biggest and brightest. Unless you happen to buy a ‘grab bag’ off the sale rack or something that disclaims no guarantee then you will want to treat them as if you got them from a plant you seeded yourself.
When you first inspect your seeds you are looking for a glossy, plump, solid shell that is brown in color with striation patterns of a darker brown running around the outside. A healthy seed will not have any cracks or pattern interruptions and will feel heavier than it looks. The heaviness happens within the formation of the seed, leaving some water weight inside with the healthy embryo. Any seeds that are grey, green or light brown with no visible pattern are immature and not good to grow. Another sign of immaturity is softness. A ‘good’ seed will have a hard shell and a uniform shape. Any malformation will show in the shell with an irregular shape or runs through the pattern. This is pretty much the same as seeing a crack in the side of the shell, alluding to the interior of the seed being compromised in some way. Any compromise to the integrity of the shell will cause the moisture stored inside during formation to evaporate.
If you can’t tell by just looking at the seed if its shell is still intact, you can check its water weight using, of all things, water! To see if your seeds have dried out or not using the water test you simply fill a container with distilled water and drop all your seeds in. The ones that fall to the bottom of the container are ‘good’, because they still have the moisture inside with the formed embryo and that extra weight allows them to sink. Leaving the floating or ‘bad’ ones at the top for you to skim off and throw away. Those don’t have enough water weight to sink meaning the shell has been compromised causing buoyancy or they are too immature, lacking formation of the completed embryo.
Another check you can do to unknown seed collection is a smell and taste test. Separate them into like piles and crack one open, smell it and taste it if you’re up for it. If it has any sort of must or oily taste that means they are old seeds and are on the verge of going bad. Any sign of black in the interior of the shell means fermentation has begun and there will be very little chance for growth. Of course this test means you are ruining some of the possible viable seeds, so it’s not something ideal for any purchased seeds.
|
Healthy root growth can be obtained with the right amount of light and moisture |
If you plan on storing your seeds for long periods a few easy steps can ensure viability and longevity. First off, pick out the healthiest looking ones with no fractures. The rest is all about moisture. Make sure your seeds have no excess moisture. You can check them by sealing them in a glass jar for a few hours, if you see any condensation on the sides of the jar after this time period then there is too much moisture to seal them up. Once the outside of the shell is dry enough for storage they need to be sealed properly to retain the interior embryo intact and you need to keep all moisture away from the storage container to prevent mold from forming. It’s a delicate balance but it can be achieved with some planning, a vacuum sealer and a good air tight container. If you don’t have a vacuum sealer then use a bag and the air tight container and sprinkling it with DE (diatomaceous earth) to keep pests and excess moisture away. Always label your container or bag so you know exactly what strain you’ve got and don’t end up with a grab bag of random seeds. Cultivators can build up a stash of favorite or hard to get strains, store them properly and have an abundance of viable seeds ready for propagation.
Once you have your best and brightest picked out it’s time for germination! The easiest way to do this is not by sowing them into the dirt or growing medium and hoping for the best. That can lead to wasted time and energy and doesn’t allow you the pleasure of watching them emerge from their shell. The method most widely used by growers to get their seeds to pop is the damp paper towel method. To do this all you will need is some paper towel and an air tight container. If your container is clear then you will need a dark place to put it while they are germinating. Start by wetting your sheet of paper towel so it’s completely saturated and then ringing it out. Don’t ring it as hard as you can but give it a good squeeze, leaving it completely moist but not dripping wet. Then fold it in half so it’s 2-ply then lay your seeds about 1 inch apart on half of the sheet. Once you have them laid out fold the paper towel over at least twice so that the seeds are completely surrounded in the damp paper towel and will not fall out from the sides. If you are germinating multiple strains you may want to use different containers so you can label them and keep them identified. Seal the paper towel in the air tight container and place it in a cool, dark place for a few days. I like to check mine after just two days. Some may already be sprouting at this point, and some may take longer than others so let them go for 7-10 days, plucking out the popped ones as they sprout.
At this point you want to let them come out of the shell naturally, don’t try to help them out by pulling off the shell casing prematurely. Once the white root has emerged and has a good inch of growth on it you will be able to see a green leaf at the top of the sprout, usually where the pieces of the shell casing are holding onto the little seedling. This means it’s time for planting!
No matter what type of growing medium you are using these seedlings are so delicate they will need extra care for the first two weeks of their life. Take extra caution when using something like Rockwool blocks, which need to be treated before use to extricate the high pH that they naturally contain. If you plan to enter into a medium of all hydro rocks then I would recommend starting in Rockwool or organic starter blocks first, then inserting those into the hydroton or rock filled container once the roots have established throughout the block. Another option is to start in a soil cup and once the roots have established you can uproot the seedling and rinse the soil off before setting into your hydro system. If you plan on a growing in a soil medium then the organic starter plugs (made from formed tree bark) or even just a small cup filled with a very light soil will do. Make sure you purchase seedling soil or a blend that doesn’t contain heavy nutrients built into the dirt.
No matter if it’s a block or soil the most important factor here again is –moisture. Most growers tend to over water with excitement in the early stages of growth, this can not only stunt the growth of the seedlings but it can also kill them very easily. There is a fine line between moist and wet, always err on the side of dry when treating babies to a watering. Make sure the container they are in has plenty of drainage and that there is no standing water in the tray below them. Let the growing medium dry before watering again, this promotes healthier and more vigorous root growth. If the roots are always in a wet medium they can not only rot out but they have no incentive to grow. Letting the medium dry a little bit (no longer than a day) sends them out looking for moisture, causing them to span growth further than they would if the moisture is readily available for them.
Another simple mistake that happens in the early stages of seedling growth is overfeeding. These guys don’t need much food as all while they are establishing themselves. In fact most nutrient lines have a special bottle of food made especially for seedlings or clones, containing a minimal amount of N-P-K and usually some vitamins, hormones, beneficial bacteria or fungi. The beneficial microbes are great for promoting monster root growth, they colonize in your root zone and live symbiotically with the roots boosting their growth rate.
If you get a good seed starter soil these things will most likely already be in there along with enough food, so all you will need to do is water for the first couple weeks. These specialty starter soils are very light and aerated, exactly what you need to keep the seedlings on the fast track for vegetative growth. You can also use your normal vegetative growth food but cut it down to at least 1/5 the normal amount. This should be plenty of food, remember less is more.
Always give your rooted seedlings 18+ hours of light and a warm grow area. Fluorescent fixtures are best for this period of growth because you can get them very close to the plants (usually 3-5 inches) without burning them, giving them a perfect amount of heat as well as letting them absorb the most lumens from the light. Also remember to keep the ambient temperature around 19-22 degrees Celcius, you don’t want them in a cold room with the only heat source being the light.
Take into consideration that these little ones will need a little extra care now while they are small and establishing a root zone, they are more fragile than clones are during their establishing phase. This is due to the size of the plants internal system. A clone starts off with an established xylem and phloem, where as a seedling needs to develop these from scratch. A little doting and babying them now will go a long way when you see them flourish into big bertha mother plants or full cycle flower into succulent and sticky colas.
S
Soft Secrets


