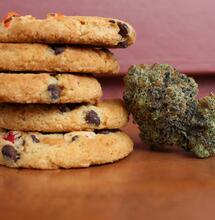
Introduction to advanced water hash
Water hash produced using advanced methods can definitely hold its own against solvent-extracted hash: In the 2013 Emerald Cup — a longtime, outdoor organic medical marijuana competition in Northern California — the first and second-place water hash winners tested at 67% and 70% THC, a level of potency once thought impossible for old-school water hash
. Advanced water hash uses the same principles outlined in the previous section, it just takes into account more variables, from the strain type and trichome shape to harvest methods and ambient temperature and humidity in the washing room.
THE MACHINE METHOD
There are several key principles for producing the highest-quality, dabbable water hash. First, trichomes must be treated gently. Mechanical agitation in the ice-bath stage is needed, but it’s also the enemy. Paint mixers are too rough for award-winning bubble. Second, heat is an enemy; it can dry out buds and sap them of their flavors and strength. During drying, high temperatures vaporize hash’s great flavors. Storing hash at a high temperature degrades its flavor and potency. High-grade water hash is being rebranded as “solventless wax,” because it gives consumers who want to dab a tasty, effective alternative to BHO and provides producers with a method that doesn’t involve flammable solvents or high-pressure machinery.
EQUIPMENT
20-gallon Bubble Now, Bubble Magic Extraction Machine, Bubbleator, or top-loading washing machine. Bubble Bags (microns — 220 zippered to hold the material in the washer; 160, the first filter, removes contaminants; 73 for high grade; 25 for lower grade) Cannabis (1,000 to 2,500 grams, frozen, high-trichome leaf) Water (filtered for best results)
Ice—enough to fill the machine 60% full,
and refill it as it melts
20-gallon bucket
Alcohol or hydrogen peroxide
Gloves
Spoon
Sieve
Parchment paper
Thick cardboard
METHOD
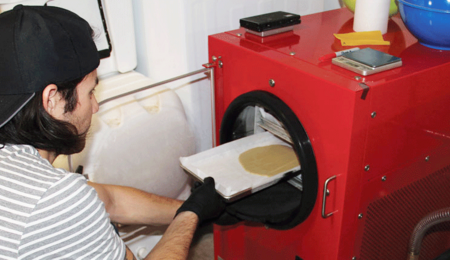
Consider the best location for setting up the machine. The best situation is a sterile lab setting:
Hash is very sticky and captures contaminants floating in the air, such as dander, dog hair, and dust, so a room with filtered air is best. The ambient temperature is best below 65˚F (18˚C) with low humidity—between 15% and 50%. Hash is oxidized and darkens when it’s manufactured or stored for long periods at high temperatures such as 80˚F to 90˚F (27˚C to 32˚C).
Next, consider the source material. Dried, cured, sugar leaf works fine, but the best water hash is made from fresh-frozen material. Trichome-rich leaves are cut from ripe plants, bagged in plastic freezer bags and frozen. Freezing locks in all the terpenes and cannabinoids present on the plant at the time of harvest; significant amounts amounts of both are generally lost to drying, curing, and processing. Thoroughly disinfect the machine, hose, bags, and buckets using hydrogen peroxide.
Line your 20-gallon bucket with filter bags, starting with the finest 25-micron bag and ending with the biggest 160-micron bag. Place the machine’s outflow hose into the filter bucket. Place a base layer of ice in the machine. Fit the open, 220-micron bag in the machine and add the material. Fill the bag half-full with 9 parts trim to one part ice. Alternate adding trim and ice. Zip up and tie the top of the bag and pour more ice over the bag until the ice level reaches 8 inches below the rim of the machine.
Add water until it’s 4 inches below the surface of the ice. Wait 15 minutes for the trim to soak up the water, then add more ice and water, until the water is below the ice’s surface level, and the ice is 8 inches below the rim of the metal basin. Leave room for the mixture to agitate.
Turn the machine on gentle and monitor the agitation. Use wooden spoons to help the bag settle into the ice bath. Add more ice and water as the ice melts and settles. The color of the water should turn completely gold quickly. On a standard washing machine, use the gentle cycle. DO NOT let the device automatically drain. Run 2 gentle agitation cycles—then let it drain.
During this ice-cold agitation process, the brittle, frozen trichomes will have snapped off the leaf, traveled through the lining of the 220-micron “garbage” bag, and into the ice bath. The water turns green, and the plant oils make the surface of the water frothy. After agitation, the machine pumps the trichome-rich water out of the washer basin and into the filter bags, which are set up inside the 20-gallon bucket.
The inside of the bucket will be foamy with cannabis oils. Jiggle the bucket gently to help water pass through the filters, and use filtered ice water in a small pump sprayer to rinse the trichomes off the bag’s sides and down and through the 160-micron filter. Start pulling the bags up one at a time. First pull out the 160-micron bag. The material inside the bottom of the bag looks like grey-green silt. Rinse down the edges, get everything collected in the bottom, and scoop up the resin.
Pull the second bag, then spray, jiggle, and repeat. The 73–159-micron stuff is a little green, but not as green as the first bag. Keep pulling, spraying, and jiggling until it’s all collected in the middle of the mesh. Trichomes smaller than 70 microns pass through the mesh, but everything from 73 to 159 microns will be collected. This is the sweet spot for trichomes. Solventless competitions are won most frequently by entries collected from the 73, 90, and 120-micron bags. However, narrow-leaf varieties have smaller trichomes, so they tend to have the nicest resin in the range of 25 and 89 microns.
Pull the bag up. It’ll be heavy with water, its pores clogged with trichomes. Slowly spin the emulsion while spraying down the sides. The mesh holds on to the glands while the fine green particles fall through with the water. Keep spraying, rotating, and pulling until the green is gone, leaving what looks like a bunch of golden sand.
Pull up the bag to the top and spoon out the wet paste onto parchment paper set on a towel or thick cardboard, or something else that will safely wick moisture away.
The next bag catches the bulk of trichomes between 25 and 73 microns. The material in here is a combination of green contaminant and gold trichomes. The goal is to have the green pass through the screen while retaining the gold. As with the last bag, pull the bag up; it’ll be heavy with water. Its pores will be clogged with trichomes. Slowly spin the emulsion while spraying down the sides. The mesh holds on to the glands while the fine green particles fall through with the water. Keep spraying, rotating, and pulling until the green is gone and it looks like a bunch of golden sand. Remove this light clay-like wet hash from the mesh and place it on a 25-micron drying screen.
TIPS
Check the seams to make sure your bubble bags are not inside out. Inspect the machine output hose line for leaks. Use a gravity-based system with suspended bags and buckets to save your back. Buy bags with lots of mesh area, durable sidewalls, and consistent micron spacing—cheap eBay bags often have inconsistent micron widths in the center of the mesh versus the edge. Keeps hands off the trichomes. Trim wet and freeze. If you make water hash often, invest in an ice-making machine. You don’t have to use as much ice when using large cubes. They don’t melt as fast as small pieces.
Strains: Different strains yield differently sized and shaped trichomes, and differing amounts of oils and terpenes. Hashing Blue Dream versus hashing Bubba Kush is like night and day at the micron level. Blue Dream trichomes are long and thin, and you can raise the temperature and humidity during drying. Bubba Kush, Sour Diesel, and OG Kush glands are short, stocky, and oily, and need to be processed at as cold a temperature as possible and dried at 40˚F (4˚C) under minimal humidity to capture the resin’s odors.
Bag Size and Number: This can vary. You can use as few as 225 and 160-micron bags, plus a 220-micron garbage bag for simplicity’s sake, or pull and spoon progressively narrower bands of glands and materials at 190, 120, 90, 73, and 45 microns.
Agitation: Purists sometimes use something as basic as a pole or paddle to gently hand-agitate the main bag in the bucket; the trade-off is in the yield. A 30-minute machine wash of 1,000 high-quality grams can yield as much as 112 grams of top-shelf hash. Less agitation equals purer hash but lower yield.
DRYING
There’s a compromise in drying. Trying to remove moisture from the hash without vaporizing the delicious yet volatile essential oils, or terpenes. Drying should be done in a room with a temperature between 40˚F (4˚C) and 68˚F (20˚C). The reason for the low temperature is that some terpenes evaporate at 70˚F (21˚C). Humidity is also a factor, with 30-45% humidity being optimal, but it can vary by strain. Drying effectively is accomplished in a number of ways, including the chop, sieve, microplane, and freeze drying methods.
ADVANCED METHODS OF DRYING
CHOP METHOD
The chop method is accomplished by chopping damp resin into small pieces so that it can be spread over a wide surface area.
In a cold room, using a small knife, chop the resin swiftly, creating rows of damp material. Then shape rows perpendicular to the first row. On a swatch of parchment paper, spread the chopped resin over the surface, taking care to keep the clumps as separate as possible. If a wide surface area is not available, resin can be dried in pizza boxes. Cardboard boxes wick away moisture well and are effective for protecting drying resin from light and contaminants. The chop method is the least effective method for thoroughly drying the resin because clumps tend to trap moisture.
SIEVE METHOD
Using the sieve method results in very small clumps of resin that do dry thoroughly. Place 2 strainers and 3 spoons in the freezer. After the wash, resin has been drying on the 25 micron screen. Wrap the screen around the resin and wrap again in a clean paper towel. Place it in the refrigerator for 2 hours. To utilize the sieve method, the material has to be cold and devoid of excess moisture.
After 2 hours, take one of the frozen strainers and spoons out of the freezer, and the resin out of the refrigerator. Place the partially dried resin in one of the strainers. Using a circular motion, lightly run the cold spoon over the mass of resin. A fine rain of resin will fall onto the parchment paper (or pizza box).
Continue to cover the parchment in a light dusting of resin powder, taking care not to pile resin on top of itself. When the resin begins either sticking to the strainer or the spoon, exchange for a fresh, frozen instrument. When resin warms, it sticks together, making sieving nearly impossible, so work quickly.
Allow resin to dry between 3 and 14 days, depending on the strain and the conditions of the room. When resin is dry, it sounds like sugar crystals when poured.
ZESTING (MICROPLANE) METHOD
A favorite among many hash makers, the zesting method consistently allows the resin to dry thoroughly.
Place three lemon zesters and the resin that has been resting on the drying screen in the freezer. It’s important that the puck be frozen. The next day, in a cold room, remove a zester and a puck. Using quick movements, grate the resin over a large swath of parchment paper (or pizza box).
Allow resin to dry between three and 14 days, depending on the strain and the conditions of the room. When resin is dry, it sounds like sugar crystals when poured.
The main drawback of the microplane method is that the trichome heads are sliced open, thereby allowing terpenes to escape. Also, ripped heads are less stable, leading to shortened shelf life.
FREEZE-DRYING METHOD
Freeze drying has only recently become a viable option for getting resin to its absolute driest. The basic idea behind freeze drying is to have water frozen inside resin pucks sublimate to vapor, completely bypassing the liquid stage. Over the course of about 24 hours frozen resin becomes like dry sand.
With whichever process used, the key is to achieve complete drying. Under magnification, the final product will look like sandy heaps of full, sticky, oily, trichome heads. Store in a cool, dark place, and don’t press until the material is completely dry.
PRESSING AND STORAGE—THE FINAL STEP
Concentrated cannabis is the future of cannabis. As covered above, water and ice can be used to mechanically separate trichomes from the plant, and filters can concentrate the glands into unpressed or “loose” hash. Further refinement using machinery and tighter control of temperature and humidity will yield the strongest nonsolvent concentrates. Pressing unrefined hash into balls, cakes, or slabs creates hashish; all steps of the process are consumable, but making hashish is a two-step process: First, the glands are collected; second, the collected material is compressed into into bricks or balls.
Pressing hash involves a combination of force and mild heat to condense the glands into a solid mass. The shape and size of hash varies depending on the pressing method. When hand pressed, hash is often ball-shaped. Flat-pressed hash may look like thin shale rock, with hardened shelf-like layers that chip along the creases. Mechanically pressed hash is usually a neat cake, like a bar of soap.
Hashish ranges in color and pliability. The variety of marijuana used, manufacturing method, temperature, and the purity of the kief influence its color, which ranges from light yellow-tan to charcoal black, and its texture, which ranges from pliable taffy to hard and brittle.
Hashish oxidizes and darkens from exposure to light, oxygen, and heat. Regardless of its texture, high-quality hash should soften with the simple warmth of your hands.
Aficionados often describe the high that hash produces as more complex than that of kief. In the region of traditional hash making kief is typically aged, sometimes for a year or more, before it’s pressed. Most modern hash makers do not wait that long.
TIP
Unpressed kief oxidizes in warm temperatures, while hash is more resilient to warmth, so long as it’s pressed when it’s totally dry. When pressed wet, however, hash molds. You can store material in its unpressed form in a cool, dark place. Once pressed, hash stored in the freezer suffers little from aging.
PREPARING KIEF OR WATER HASH FOR HASH MAKING
Before attempting to press kief or water hash the material must be completely dry. To ensure that all moisture has been eliminated before pressing, dry the material one last time. Place the kief or water hash in a food dehydrator set on the lowest setting, or a horticultural heat mat (preset at 74˚F [23˚C]), microwave the material on low, or place it in an open dish in a frost-free freezer. The vacuum conditions promote water evaporation, preventing mold from infecting and spoiling the hash. However, when the drying temperature is above 75˚F (24˚C), some of the terpenes will evaporate, diminishing the kief’s unique odors and their effects.
Pressing transforms the material both chemically and physically; the glands are warmed and most break, releasing the sticky oils that contain the psychoactive cannabinoids, as well as the terpenes—the source of cannabis’s smell, taste, and suite of effects.
Terpenes lend fragrance to the hash. Smells and flavors characteristic to hashish range from spicy or peppery to floral. Many terpenes are volatile at room temperature. When inhaled, they contribute to the lung expansiveness (cough factor), as well as the taste. Aged kief is both milder in smell and flavor, and less cough inducing, because some of the terpenes (but not the THC) have dissipated.
Releasing and warming cannabinoids exposes them to air. This has the beneficial effect of potentiating the THC through decarboxylation. Continued exposure to light, air, heat, and moisture leads to THC deterioration.
You can press hash manually or mechanically. Manual methods work well for smaller amounts. Mechanical methods use a press, which is fast, convenient, and efficient. This section describes a reliable manual method and covers mechanical pressing.
SHOE HASH METHOD
This pressing method lets you multitask. While you’re busy doing other things, the hash is being inconspicuously pressed within your shoe! Shoe hash is a low-hassle way to press a small amount of kief or water hash. A few grams, usually 5 grams or less, are bagged in tightly wrapped cellophane or parchment paper wrapped around the material several times. A piece of tape stops it from unfolding. Punch a pinhole through the package to allow trapped air to escape. Don’t use a plastic bag because the hash sticks to it messily. It’s important for scientific as well as psychological reasons for the material to be securely sealed before it goes in your shoe.
Place the package inside the heel of your shoe. Hard-soled shoes or boots are better for pressing than soft-soled shoes, such as sports shoes, which take longer to process the kief. The heel’s weight and pressure within the shoe, aided by body heat, presses the hash into a slab. The pressing takes 15 minutes to an hour of on-foot activity, but it benefits from additional wear.
PRESSING BY HAND METHOD
Pressing by hand is a method for transforming kief into hashish a few grams at a time. Pressing by hand is convenient since it requires no additional equipment but it takes considerable energy and the results are better with a practiced technique. Those unaccustomed to hand pressing may find it difficult to make the material bind together. The considerable work it takes to get well-pressed hash can easily result in sore hands.
This method works best using freshly sieved medium to high-quality kief. If the kief contains a significant amount of vegetative material, it’s harder to mold into hash and may not stick together properly. To hand press, measure out a small mound of fresh kief that will fit comfortably in the hand, usually a few grams at the most. Work this material with one hand against the other until it begins to cohere into a solid piece. Then rub it between the palms, or between palm and thumb. After 10 minutes or more of working the material, it begins to change density. Dry, aged kief lacks some of its original stickiness and may take longer to stick together, but if it was stored properly, it should cooperate, though it may require more kneading. When a piece of hashish has not been pressed properly, it crumbles easily at room temperature.
If the kief is particularly stubborn and won’t stick together to form a mass, mildly heat it. Wrap the material in food-grade cellophane, ensuring that it is completely sealed and all the air is squeezed out. Wrap this package in several layers of thoroughly wetted newspaper, cloth or paper towels. Turning frequently, warm in a skillet that is set on the lowest heat. It doesn’t need to be heated as long as other methods because the only point of heating is to get the material to stick together so it can be kneaded into a solid piece.
Another method is to wrap it the same way and press it for a few seconds on each side with an iron that is set on a very low heat setting.
HOT WATER BOTTLE METHOD
The concept of using the hot water bottle method is similar to pressing by hand. However, more heat is applied to thoroughly melt the waxy cuticle of each trichome head. This method works with medium- to high-quality resin that is bone dry.
Place a pile of resin on the surface of either organic cellophane or parchment paper. Fold the paper in half. Bring water to a boil. Fill a wine bottle with the hot water. Allow the bottle to cool for 5 minutes. Place the hot wine bottle on the paper-covered resin and allow it to sit for 30 seconds.
Look through the bottle to the darkening stain of the warming resin. If the color is changing quickly, you have the sign that the resin will press very quickly. If the resin barely begins to change after 30 seconds, you will have to work the resin considerably more. Using a series of passes, roll the wine bottle over the resin using minimal pressure. Allow the heat to melt the material without forcing, using the pressure of your hand. Flip the paper over and do the same process in the other side.
By now, the resin should no longer be a mound, but flatter and more of a patty: If not completely so. With a swift flip of the wrist, open the paper. The resin should be sticky and have a nice sheen. Fold the resin in half and then again and begin to press once more. Repeat this process one more time before taking the warm resin into the palm of your hand.
To create a modern-day “temple ball,” roll the ball like a mass of clay. Roll it with firm pressure; compressing the resin together and pushing out any excess air. Resin that has lumps, lines and wrinkles need to be more thoroughly worked. Continue rolling the resin until you’re satisfied with the mass in your hand.
With very high-quality resin, the result will be a completely melted, shiny mass of resin ready for storage.
MACHINE-PRESS METHOD
Making hash is a cinch with a mechanical press. Bookbinding presses, called nipping presses, can be used. Plans are available on the web for building a press using a hydraulic jack.
Hand-pumped hydraulic presses are a less expensive way to get a tight press. Another cost-effective method uses a vice grip, although it takes some adaptation.
For small amounts, a pollen press can be used in conjunction with a handheld kief-collecting grinder. Kief is added to this small metal tube. The tension pin is placed in, and the pollen press is screwed shut. The next day, the kief has been pressed into a neat hash block. Many companies have similar presses now, including one made of stainless steel with a low-torque T-handle.
STORAGE
Once the hashish is pressed, it can be kept for months or possibly years with little deterioration to its potency and flavor, with proper storage. A frost-free freezer is the best place for storing hash.
Metal, glass, or silicone containers are preferred for storage. Plastics and rubber are not recommended because the terpenes—responsible for the flavor and aroma of the hash—are somewhat volatile compounds that interact chemically with plastic or rubber, degrading both the hash and the container. However, this happens slowly under freezing conditions.
Over time, the outer layer of hashish oxidizes and loses potency. The inside, not exposed to higher levels of light and oxygen, remains potent. Remember that mild light, heat, moisture, and oxygen oxidizes the outside of the hash, destroying its potency.
Making hash is a wonderful method of preserving resin long after cannabis has been harvested. Whether in the kitchen or in the lab, hash making is a process that is available to everyone. Using old school methods or new school techniques, the process is relatively straightforward — agitate to remove trichomes, collect the resin, sort the resin by size, dry the resin, smoke and enjoy!
Original Resinator
Like so many cannabis-related technologies, the origins of the Resinator was a labor of love. The prototype machine was built in 2008 by Travis Arnovick and James Watts. This original bucket-based contraption was held together by duct tape, bungee cords, silk screen, and paper clips. After they strapped on the engine — an old BBQ rotisserie motor — it was ready to roll. This magnificent beast went through a long series of trials and test runs until the first market-ready Resinator was built in 2011.
Before their Resinator endeavor, the company founders used to spend long days and nights trying to maximize the amount of resin they could extract from trim and shake, and quickly came to the conclusion that there had to be a better way.
“We would go about collecting the resin glands through a variety of old school traditional methods, but these procedures were too labor intensive and time consuming,” says Arnovick. “So we thought that there had to be a better way, and wanted to take the manual element out of the equation and make the process mostly mechanical. So we set out to create a solution to this problem.”
Today’s Resinator is a multi-use, wet/dry, flash freeze, all-in-one, patented, rotary separation apparatus. The machine uses a dry sieve tumble method — aided by CO2, dry ice and water — to extract the essence of botanical resin glands from wet or dried flowers and plant clippings.
The company’s uniquely crafted Resin Collection Bags and removable/washable drum screens sift undesired plant material, stems, and particulates, leaving only the desired trichomes to fall through the high-quality, micron-rated monofilament screens. The combination of these methods and ingredients significantly increases yields and efficiency compared to other sifting techniques.
Some of the design features that set the Resinator apart from the competition include its removable/replaceable and washable screens that come in 8 different sizes, depending on the type of extraction or separation that is desired. Another important aspect of the design is the use of liquid CO2, which allows producers to work with live plant material and extract live resin from uncured biomass. This method of extraction is popular with a variety of rosin techniques, including closed-
loop systems, short-path/fractional distillations and ice-wax extractions. The liquid CO2 allows the machine to instantly freeze, fracture, and extract resin glands and trichomes from cured and uncured plant material, achieving 20% (or better) returns in less than 10 minutes.
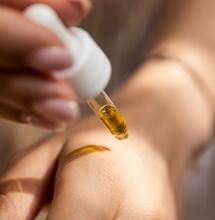
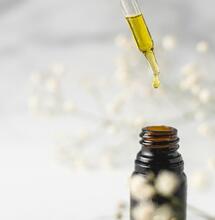
Manufacturers of tinctures, oils, salves, topicals, edibles, and concentrates always prefer pure extracts, and the Resinator delivers high-quality resin all day long. The Resinator can also be employed as a wet/dry flower trimmer, using a mesh screen and CO2 to accomplish up to 80% of the job.
“We spent countless hours in the field with R&D and went through so many concepts, mold changes, screen designs, and motors,” said Arnovick. “Success and failures alike, we stayed diligent in our pursuit of perfection until we finally found the winning combination. We weren’t NASA scientists, just a couple of dreamers with passion to bring our ideas to reality.”
HOW TO USE THE ORIGINAL RESONATOR XL MODEL:
The Original Resonator extract only the pure essence of botanical female Resin glands from dried flowers and plant clippings. Sift undesired plant material, stems and particulates leaving only the desired trichomes. Escape from the world of residue left over from solvent extractions. Weigh and measure your materials in preparation for a wet or dry trim Empty material directly into center chamber of the Resinator and zip up the mesh bag Install the CO2 coil and make sure to have the temperature diode located somewhere in the chamber. Turn the Resinator on to a low speed and inject liquid CO2 for 20 to 40 seconds. It needs to tumble for about a minute per pound of material. Add ice and water directly to the chamber and let it tumble for about 20 minutes Take your three bags and put them in a bucket, attach the hose to the Resinator.
Let the water drain from the chamber into the bucket Plug the hose-hole again and repeat the ice and water steps for a second run, let it run for another 15-20 minutes Shake the rest of the water from the bags into the bucket and empty the bags of material onto a tray and let it dry.
S
Soft Secrets