Growing in a Greenhouse Part 1
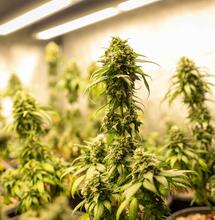
Growing medicinal and recreational cannabis in greenhouses is efficient and less taxing on the environment and pocketbook than gardening indoors under lights. Unheated greenhouses protect plants from the elements and extend the growing season several months; add heat and you can grow year-around in most climates.
Soil warms early in raised beds and in containerized plants.
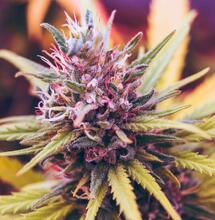
Greenhouses can also be equipped with lights to extend vegetative growth or augment natural sunlight. “Light Dep” greenhouses can be blacked out to induce flowering with a 12/12 day/night schedule during the summer. Light deprivation greenhouses are so popular in Northern California that Garberville celebrates the “Golden Tarp Awards” every year profiling the best Light Dep flowers.
I have seen many inexperienced growers invest too much money on their greenhouse for things they did not need or use. In every instance, the growers did not have a clear written plan and were motivated by emotion rather than good sense.
A small greenhouse is easy to make and set up.
Greenhouses can be temporary or permanent. Permanent structures are more expensive to construct and may require a building permit. Temporary greenhouses can be removed when the weather permits and replaced if necessary.
Be realistic. Is the purpose of greenhouse a hobby or business? Will you actually use greenhouse in a few years to grow plants or will it turn into a storage building? It is easy to overbuild and overbuy – too much and too expensive construction materials, poor planning, purchase stuff to fix problems after the fact, expensive controllers, fancy lights, be cooler than your buddy because you have something they do not. take your emotions out of equation. Neighbors can also hate it. Check before starting.
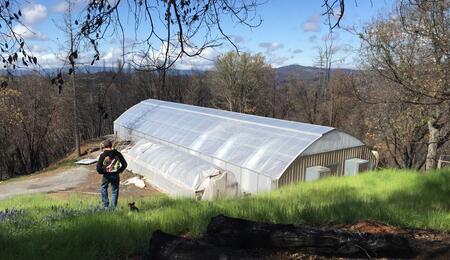
The type of structure you select depends on the size and location of your growing area your budget and how much time you can dedicate to your garden. Small movable “pop-up” greenhouses are convenient and practical. Simple cold frames and greenhouses can be assembled from common materials such as old, framed windows and 5 × 10 cm timbers. Small heated-and-cooled greenhouses are a little more complex. Hoop houses are inexpensive practical and easy to install. Large commercial greenhouses are best purchased from and installed by professionals. A good, specialized greenhouse can be used year-round in most climates. However heating and cooling costs vary in relation to climate and seasonal weather changes.
When deciding on a garden structure first take a look at your budget in terms of both money and time. Greenhouses can be just as much or more work as an indoor garden. Start with a small greenhouse and learn the ins and outs of growing in your climate. Greenhouses tend to warm up quickly when the heat of the sun hits them and cool rapidly when the sun goes down. Keeping the temperature from fluctuating too much can be difficult. It takes understanding experience and a little luck to master temperature management.
Greenhouses must have:
• full sun to partial midday shade
• proper air circulation and ventilation
• good humidity and pest control
• water-resistant electrical outlets
• a hose bib to provide water
• insulated water lines to avoid freezing if necessary
• tables benches and places to hang plants (if they are not on the floor)
• a dry place to store fertilizers potting soil and tools
Siting the Greenhouse
Choosing the perfect location to site your greenhouse will lower costs and avoid many potential problems. When sited in the ideal location heating and cooling costs will be minimal and you can use the surrounding geography to keep air flowing around and inside the structure. Orienting the greenhouse in the proper direction will take advantage of the natural arc of the sun so that all plants receive the maximum amount of direct sunlight. If your growing climate is beyond breezy, protecting the structure from wind saves construction costs and stress. The ability to drive a vehicle and roll a wagon and wheelbarrow on flat land to the garden makes unloading supplies easier. A level location also saves excavating soil and rocks before construction starts. An accessible water source for irrigation is essential. Electrical service to operate fans, lights and power tools may be necessary too. Best to plan ahead and make sure you have everything sorted before lifting a shovel.
Southern exposure is ideal and guarantees that more sun will shine on your beautiful, enclosed garden. It is all about the path of the sun through the heavens. After south, the next best placement in relation to sunshine is southeast, followed by southwest and northern placement is dead last.
Orient the greenhouse east to west so that the sun passes from one end to the other rather than from side to side. Shadows are reduced to a minimum when the greenhouse is oriented parallel to the arc of the sun. Orienting the greenhouse so that the ends are facing north to south ensures more plants will be shaded, not good.
Heat generated from sunshine collects inside greenhouses. Ideally you can site the structure under the shade of a deciduous tree so that the greenhouse receives shade during the hottest part of summer days. In the winter when the sun is lower in the sky, deciduous trees lose their leaves and allow light to pass directly to the greenhouse. I love the way Mother Nature makes our lives so easy!
Windy weather is a major concern. The cost of building a wind-tolerant greenhouse increases as air speed climbs. Sheltering the greenhouse from heavy wind saves heating and cooling expenses. Buildings, trees and high foliage around the greenhouse lower wind velocity. Constructing a permeable shade cloth wind barrier is one relatively inexpensive option to reduce wind speed. A greenhouse with many open cracks and holes lets in wind. This wind sucks the life from plants, causing them to dry out quickly, which increases watering maintenance. It slows growth too.
Good soil drainage is essential when growing in containers and especially if growing in the soil floor of the greenhouse. A lot of water will be absorbed by the earthen floor. If drainage is poor the water builds up below creating more problems. Natural drainage if free. Building a drainage system is expensive and time consuming.
Flat land rules! In the old days before legalization, we were forced to locate greenhouses on hillsides or in low areas under trees, not today! You will need to haul a lot of supplies into the greenhouse and harvested material out. Driving a vehicle on flat land that stays dry all year around makes your life easier. Avoid setting up a greenhouse in low spots with a high water table, on flood plains and hillsides. All of these locations make more work and cost more to maintain.
A good source of clean water is essential. If possible, run an underground main water line to the greenhouse and set the hose bib inside the greenhouse. It will also ensure adequate water pressure. Installing the hose bib near the main door inside the wall is least expensive and easiest to access. Water is available inside and outside the structure. Make sure the main line to the greenhouse supplies more water than you will need so that you can expand square meters later. Bury the line deep enough so that vehicle traffic and freezing ground does not disrupt the supply. If burying the main line is not possible, make sure that it can be drained when freezing weather sets in.
Electrical service may be necessary to operate electrical fans, pumps, lights and power tools. A dedicated electrical line buried in conduit or strung high enough overhead so that machinery can pass below will be necessary. Use only grounded electrical cable and conduit rated for underground use. Shifts in the ground and moisture can stop your electrical service. Adequate cable thickness is also required. Electrical voltage drops as electricity moves away from the source. Install a breaker box with breaker switches in the greenhouse to interrupt electricity if an overload or short circuit occurs.
Fans, pumps power tools and lights can draw a lot of electricity. Their electrical consumption is rated in amperes and listed on the appliance. Add up the total of all the appliances to learn the total amperes. The electrical supply will need to be at least 20 percent more than the total amperes used when everything is turned on. I suggest the electrical supply should be more than you plan to use so that you can expand. I always consult a qualified electrician for such projects, please do the same. See “About Electricity” in chapter 21, Lights and Electricity for more information.
This is an excerpt from the new, unpublished 7th Edition of Marijuana Horticulture (AKA the Bible) by Jorge Cervantes. The 7th Edition of Marijuana Horticulture will be available fall 2021. Find all of Jorge´s books at all amazon retailers worldwide.