Securing and Growing Your Personal Stash of Weed

No matter where you were born, where you grew up or what football team you support, we can all agree upon one thing: in this life, there is nothing better than a nice bit of personal stash! How to make sure that you always have your personal stash of cannabis? Keep reading and get ideas + instructions for conducting a ‘low-profile’ small operation so that you always have good buds on your end.
The sense of achievement that rushes over as you take that first toke on a joint of homegrown is as intoxicating as the weed itself! Watching your pals smile as you pull out a nice little bag of your latest harvest fills you with pride - there is no better feeling.
Even if you only manage to scrape a few grams off of some spindly plants grown at the bottom of your closet, so fucking what! You grew that and no one can take that away from you. Unless your friend usually pulls out a bag of bigger and better personal smoke, that is! Then maybe, just maybe, it is time to step it up a notch and watch Soft Secrets Perfect Grow series - rumor has it it is the ultimate guide to optimize your personal stash production.
Best Locations to Cultivate Your Personal Stash of Weed?
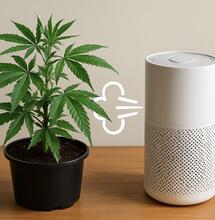
The personal stash grow is, by definition, a small-scale affair. Unless your personal use is bordering on Marley territory, then think small and compact: a square-meter space will suit four decent-sized plants, or up to eight if you want to keep them small and flower them quickly. Of course, if space is at a premium (or if the missus/mister is not particularly understanding and relegates you to the closet under the stairs), then nearly any little nook or cubby hole can be converted for a bit of personal pot production. For example, the bedroom closet is a classic personal stash location. Just make sure that you have some way to extract the hot, stale air from your grow space.
However, if you are blessed with a choice of locations in which to house your personal garden - or if you are lucky enough to have an understanding partner who may even be a fellow toker, the holy grail! - then choose wisely. For the sake of this guide, let us assume that fate is on your side and that you have a number of options at your disposal.
Firstly, it is preferable to keep your grow space concealed from visitors, friendly or otherwise, so that immediately rules out the communal areas of the home. You are going to have a hard time convincing the mother-in-law that the rectangular tent in the corner of your living room is your new spray tanning cabinet or portable airing cupboard (believe me, I have tried). It is far better to house your personal stash within the areas that are usually off limits to guests, which leaves us with the following shortlist.
Tool Shed or Garage
An interesting candidate, with its own set of pros and cons, depending upon your domestic setup. The shed can be viewed in two ways, either a private oasis into which you can escape from the everyday stresses of home life (the perfect environment into which a grow tent can be slipped unnoticed), or it is a dumping ground, piled ceiling-high with boxes of holiday decorations, the lawn mower, an old stroller and piles of old paint cans - in which case, it is a serious clean-out job or a non-starter. Either way, security levels will vary depending upon the area in which you live and the proximity of your neighbors. If you can wire electricity to it and are confident that it will not get broken into, then the shed or garage is a good contender.
The Greenhouse
This is usually attempted if your neighbors are far away or have no sense of smell! An isolated greenhouse provides an excellent opportunity for an outdoor personal stash weed grow that can be run alongside an indoor crop. Plant out in early springtime to ensure that the frosts have finished and you will be harvesting in late September to mid-October. The greenhouse grow requires much more patience than the indoor grow and is more susceptible to the elements and pest attacks. Although, if all does fail, at least you have not wasted any electricity in the process (not that that will be any consolation.) If all goes well, you benefit from natural sunlight that is concentrated onto the plants, resulting in buds that are closer to the strength of indoor-grown Cannabis.
The Bedroom Closet
The classic personal stash hotspot, favored by students in shared accommodation and city dwellers short on space. Keep the grow lights low-powered or you will forever be kept awake at night by the drone of your extraction fan. A lower chance of detection makes up for the lack of space, providing a good option for a small number of plants.
The Spare Bedroom
Spare rooms can be real contenders for grow spaces, particularly if you have more than one. Although they are nice and easy to access on a daily basis, this does carry security risks and is open to detection by the stoned house guest who is searching for the bathroom. A tent set up in the corner of the room creates an immediate personal stash grow room and prevents you from having to cover walls in black/white plastic, which is very handy if someone in the house is not too keen on you becoming a self-sufficient marijuana smoker!
The Attic
The attic could prove to be a stairway to green heaven! That is, moving into serious personal stash territory. No house guest, however stoned, is going to stumble into your attic, particularly if they have to climb a fucking ladder! Attics offer a great, secure location and plenty of space, plus they are nice and easy from which to extract stale air.
You do, however, need to watch out for temperature fluctuations spoiling your fun. Attics will get hot in the summertime, so increase your extractor fan size by a couple of inches during the warmer months. They will also get cold in the winter, so it will be well-worth dropping a submersible heater into the nutrient reservoir if you are growing in hydro setups.
The Basement
The ultimate, the definitive, the perfect personal stash cannabis grow area. Basements usually come with a lockable door that immediately takes care of any detection issues; plus, they are easy to access - no tricky ladders to climb up and down like there are in the attic - so you can easily go in and out on a daily basis.
The best thing about the basement, the icing on the cake, is the environment: nice and cool in the summer and straightforward to heat in the winter - just chuck a portable fan heater in during the winter months and the excess heat will safely disperse throughout your house. The basement is tailor-made for year-round growing.
So, with the location sorted, it is time to move on to some of the finer details.
Setting Up the Light in Small Spaces
In most instances, your lighting setup will be dictated by the location of your grow. If you are using a very small space, you will be looking for a minimal amount of heat in order to get the best from your plants; however, if space is not so much of a problem, then you will be free to use more powerful lamps and exploit the optimum yield from your plants. The options are outlined below.
Compact Fluorescent Lighting (CFL)
A good idea if heat dispersion is an issue. CFL lights are a relatively cheap option, as you do not have to purchase a ballast (they can plug straight into the mains) and they produce comparatively little heat, which is good in very small spaces. Tailor-made, horticultural CFL lamps are available in a range of outputs from 100-watt up to 300-watt, with the lower-output versions being more suited to propagation than full-cycle growing.
A 250-watt CFL will produce a decent personal stash yield, with the downside being that CFL grows tend to take longer and yield less than their equivalently-powered high-intensity discharge or HID counterparts, due to the comparatively lower light intensity. Buds cultivated under CFLs will be fluffier and less dense than if they were grown under HID lamps.
High Intensity Discharge (HID)
Ah, the old faithful. Believe it or not, HID lamps are still the go-to method for indoor cultivation in certain countries; they are available in a range of outputs from 150-watt to 1000-watt. Choose the power of your lights based upon the amount of space that you need to cover, the yield you are looking for and, maybe more importantly, the quality of your extraction - there is no point setting up a 600-watt rig in the closet if you cannot remove the hot air from that location. You will cook the plants! For growing in up to a square meter, go for 250-watt or 400-watt setup, while a larger area will need a lamp with more coverage - a 600-watt lamp will adequately cover a 1.2-meter-square personal stash grow space.
The beauty of the personal cannabis stash grow is that you can go as hi-tech as you want. If the budget is of no concern, the sky’s the limit; get yourself down to the nearest decent grow shop and start browsing! LEDs that can be remotely controlled and reflectors which are available in a huge range of shapes and sizes can be combined with air-cooled options, allowing you to run grow lights with a higher output and extract the heat directly off of the lamp using ducting and a small extractor fan.
Just remember, the key to personal weed stash success is your growing environment. Proper lighting and extraction is more important than the cannabis strain you’ve chosen, the nutrients or the growing technique. Make sure you choose an extraction fan that will fully and continuously exchange the air in your grow space. Also, do not forget your carbon filter!
Any Preferable Weed Grow Methods for Personal Stash?
You can choose any growing method or style of grow to suit you. At the most basic level, just some simple pots and compost from the garden center will see you through. But, really, the cannabis grow for personal stash is all about treating yourself.
It depends on you if you want to experiment with a few plants in a hydro setup and bag yourself a bigger yield of commercial-quality weed. Perhaps give NFT or aeroponics a try. If you only have time to check in on your plants every few days, a drip irrigation system will help you cut down on your workload. And if you are looking for the ultimate taste, effect and quality - maybe you should try soil as a growth medium and only organic nutrients, additives and pesticides.
The nutrient package you select can be as complicated as you want it to be. If you just want to keep it to the minimal amount of fuss, a straightforward grow-and-bloom feed and flowering stimulator will see you through to a decent yield.
However, if you want to invest some time and go all mad scientist, really push your plants to their limits and attempt to break the gram-per-watt boundary, an incredible range of additives are out there: root stimulators, foliar sprays, silicon additives, beneficial enzymes and bacteria, growth enhancers and bloom boosters. Just do not forget your wallet when you go shopping for them!
Finally, it is time for the main event, the big question: which girls are you going to invite to the party? Picking your strain is a tricky decision as there is so much incredible choice out there! If you are growing from clones, then your choice is made for you, but if you are starting from seed then the possibilities are almost endless!
My advice would be this, why choose something that you can usually get? If the Kush is flowing in your area - and if it is decent - then maybe go for something more exotic. Take a look at the strains that are rarely an option commercially, such as a soaring sativa with a longer flowering time or, at the other end of the scale and if you need a harvest mega-quickly, a potent auto-flower.
Loose Lips Sink Ships
So, you have made sure your location is discreet enough not to be discovered and installed an extraction fan and - more importantly - a carbon filter, to ensure that your personal stash grow does not tickle your neighbors’ noses. Plus, your single-light setup is barely registering on the national grid.
Your personal stash grow is undetectable and will remain a secret forever, right?
Wrong!
The cruel irony of the ultimate personal stash cannabis grow is that all the pleasure and the pride that you experience when pulling out that tasty little green bag and sharing it with your pals, has to remain hidden. Because, with a personal stash grow that is so well controlled and so discreet, the only thing that will uncover it is YOU!
When embarking upon the ultimate personal stash cannabis grow effort, you must resign yourself to passing off the source of that delicious personal stash using little white lies, as you will often be faced with the question, “Nice weed! Where did you get it?”
It is time to start practicing. Now repeat after me....
“Just got it off some dude at the local bar!”
More from Soft Secrets:


