Growing Cannabis Outdoor FAQ
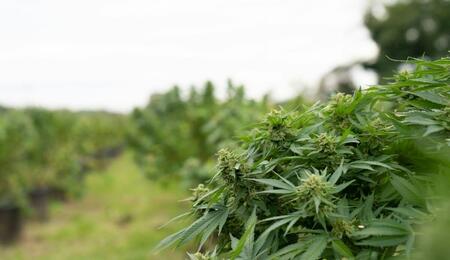
Growing outdoors is a great way to harvest without the hassle of electricity bills, manipulating ventilation or taking up indoor space. Real sunshine imparts a flavor to Cannabis that no indoor plant can match. Other times, for a variety of reasons, growing somewhere in nature is the only way that works, because you want to keep the entire operation a secret. In this article, we cover the basic most frequently asked questions about growing cannabis plants in the great outdoors.
Ever wanted to do a crop under that great big grow light in the sky? Growing your favorite plant just as nature intended? If you have always desired trying your hand at an outdoor crop, here are some answers to commonly-asked questions.
When Should I Start?
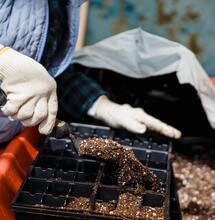
In more northern parts of the United States, seeds should be sown in early April so that they are ready for moving outdoors from mid-May to early June (warmer parts of the country enable the plants to be placed outdoors as soon as the final frost has passed, likely early April). You can start them indoors under a regular propagation light, CFL lamp or even on the windowsill or in a greenhouse. If you would prefer to take some larger plants to the grow spot, you could veg them for three weeks under a metal halide lamp or HPS with a blue spectrum. As you get closer to planting out, harden them off outdoors - just a few hours a day at first to acclimatize them to the outside temperatures.
The plants will vegetate throughout the months of May and June and will be triggered into the flowering photoperiod after the summer solstice - the longest day of the year - after which the daylight hours become progressively shorter.
Most strains will take between eight and twelve weeks to finish flowering, meaning that the crop will be ready to harvest between the end of September and the start of November.
Where Should I Grow Weed Outdoors?
Unless you are lucky (or rich) enough to own a nice bit of land or live in a rural area with no neighbors around, chances are that you will not be growing in the back yard. This means that you will be growing guerrilla-style in a clandestine spot.
Treat your outdoor grow plot with as much secrecy as you would an indoor grow. In fact, it should really be treated with extra secrecy as anyone could steal your precious crop from an outdoor location - at least when you grow indoors, it is behind lock and key! It is a good idea to start looking for potential grow spots the year before you want to do the actual grow. Visit the spot a couple of times in each month that your intended grow will be there - April or May through October - and see how the landscape and foliage changes throughout the growing season. An area that may look well protected in the middle of summer could look very open at a different time of the year and could leave your crop exposed.
Wasteland, scrub land and woodland can all provide excellent spots. Use the landscape to your advantage: a tall hedgerow will hide your crop nicely, swathes of nettles will do the same, natural clearings within heavily-wooded areas also provide perfect grow spots. Preferably, you will want a spot that is difficult to access. If it is difficult for you to access, then it is very unlikely that it will be discovered by an athletic dog walker or hiker. Thorn bushes are a superb natural barrier that will deter any random person who stumbles into an area. Find an area of thorn bushes with an open piece of ground in the middle and you have hit the outdoor jackpot! Alternatively, get the tools out and make yourself a nice open spot in the middle of the thorns.
When you are visiting the spot and surrounding area, take a look for any signs that other people have been around: fresh litter, dog shit, hedges with straight, trimmed edges - these are all giveaways that other people are visiting the site. Remember that telephone poles and electricity pylons are usually maintained once or twice a year, so avoid planting out close to these.
How Much Sun Do I Need?
Realistically, your plants will need five to seven hours of direct sunlight per day. To achieve this, you will need to find yourself a south-facing grow spot. So, when you are scoping out new grow spots, it is a good idea to visit a potential spot throughout the day and watch the sun’s position. The more direct sunlight the plants get, the more they will develop during the vegetative phase and the better the yields you will harvest.
You can also use mapping tools on the Internet to try and determine if your plot receives a decent amount of sun. A program like Google Earth is great, as options can display the current level of daylight at the location you are viewing.
It is more than recommended to look for a spot that is facing south. If it is north-facing, it will not receive a decent amount of sun. A spot that receives direct sunlight from early on in the day is best, as morning dew will tend to get trapped in buds and may form mold over time. Early sunlight will dry out the moisture trapped in your outdoor buds and reduce risk of bud rot.
What Cannabis Strains Should I Grow Outdoors?
The agony of choice! There really is no shortage of seed banks to choose from, each one of them will have a strain (or several) that they recommend for outdoor growing and the well informed seed banks will even provide a latitude range in which to grow each strain. A good strategy when you are embarking on your first outdoor grow is to sow a few different strains and see which one performs best. Just make sure you spread the strains across your various grow spots to minimize the risk of losing a few plants.
Durban Poison, Skunk #1, Hindu Kush and Northern Lights have a proven track record in the United States for outdoor growing. However, plenty of outdoor cannabis growers also try auto-flowering strains. These are not photoperiod-sensitive plants and thus will flower under any lighting conditions and do not require a specific light cycle. Therefore you do not have to rely on the days getting shorter in order to get them to flower. This makes them a safe bet for pulling some decent outdoor weed, because you can basically plant them out when the weather is already nice and warm, safe in the knowledge that they will be ready to harvest within sixty to ninety days.
There are a huge amount of regular and auto- strains available. Check the forums for feedback, or talk with a budtender, and try them out for yourself to see which works best at your particular latitude.

How Do I Cover Up the Smell?
Put simply, you don’t! When you are growing in the great outdoors, it is very unlikely - unless you are growing a very large number of plants - that the smell will carry to the extent that it gets you into trouble. Having said that, there are a few tactics that you can employ that will ensure that your precious plants do not get rumbled. Do not plant out close to public roads, footpaths or horse trails; this one is pretty much common sense as the smell of your plants will travel a short distance before it disperses. Also, if you are very concerned, you may want to try to find a spot close to an area that would mask the smell; farmyards or sewage works are a good cover - just make sure your site is well-hidden.
How Do I Get My Plants to the Grow Spot?
Keeping your grow spot a secret means being discrete during your visits, which may prove difficult when you are trying to transport your plants there. However, that is not to say that it is impossible to keep your girls hidden when you are planting out. Taking them to your spot in a cardboard box or a plastic storage container will keep them safe, but could look suspect if you get spotted. A great way of moving plants around when they are in a small pot is to wrap them in cylinders of newspaper and fold down the ends with duct tape. These cylinders can then be easily stored in a backpack or, if your spot is near to a river or pool, a fishing rod bag. Plastic drink bottles cut in half also make good carriers; simply place the plant inside and tape the two halves back together. This should make the plants discrete to move around while keeping them safe and secure.
How Do I Prevent Attacks from Pests?
When you are growing outdoors, you are never going to eradicate insects. There is very little point in spraying for pests as you are not going to visit the spot often enough to maintain treatments. However, two pests that you will need to protect against are rabbits and slugs. The latter can be sorted out with simple pellets, reapplied to your spot during each visit.
Rabbits need to be kept away from your plants using a physical barrier; the best method is to make a tube of chicken wire - around a foot in diameter - that can be placed around each plant. This should be enough to keep the pesky bunnies at bay while the plants are small and vulnerable.
In certain areas of the country, you will also need to protect against deer, who love to munch on tasty new leaves and shoots. Building a deer fence around your guerrilla grow site is not usually an option, so you will need to look at other protective measures. Some growers believe that urinating around the site will put the deer off of visiting (plus, it feels good to mark your territory). Others believe that hanging bars of heavily-fragranced soap around the edges of the site will deter the deer. Soap will also last longer, meaning that you will need to visit the site less frequently than if you were only using the pissing method!
How Do I Make Sure the Soil is Okay for Growing?
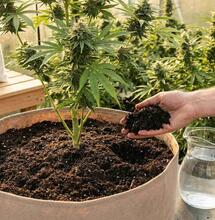
Unless you are adamant on using containers, you will be planting into the ground and letting good old Mother Nature do her work. Having said that, there is nothing wrong with giving nature a helping hand and you will undoubtedly get better results if you add some additional feed to the soil or use grow bags. The first thing to do is get yourself a soil test kit from your local garden center or grow shop and check the pH of the dirt. The ideal pH is roughly six to seven; if the pH of your spot is not within this range then you can treat it in the three months prior to setting up your grow; add lime to raise the pH or sulfur to lower it.
When you are planting out, you can mix multipurpose compost or All Mix into the soil, if you wish. It is also a good idea to use slow-release organic fertilizers such as worm castings, bat guano, bone meal and feather meal. These can be added to the top soil over the roots of plants transplanted directly into the ground and will break down over a few months, releasing feed to the plants. Speak to your local grow shop and they should be able to recommend some suitable feeding products.
How Often Do I Feed and Water My Cannabis Plants?
After they have been planted out, you will only need to physically water your plants if your region is experiencing a severe drought, i.e., no rain for three to four weeks. If you have picked a spot that has sandy soil that is very fast draining, it may be worth paying a few extra visits to your spot and checking that your outdoorsy cannabis plants are not looking too dry.
There is no point investing in mineral feeds and additives as they will quickly leach into the soil after it has rained. If you do not mind visiting the plants often, you could hand feed them with an organic bloom feed once every-other week during flowering. If you do not want to visit the plants that often, just add some bat guano to the top soil - although you will still need to water this in once a week, unless it rains... which is likely!
Happy growing!
Also read on Soft Secrets:
