Beginner's Guide on How to Grow a Cannabis Plant
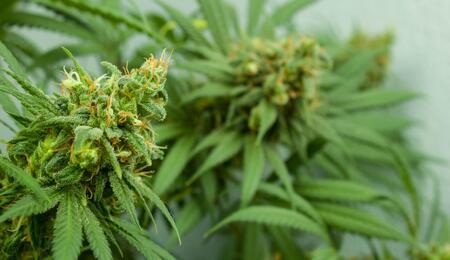
Hey y'all newbies out there. Whether you don't know where to begin with growing, don't quit but continue educating yourself. Remember some of the basic rules and keep learning by doing.
Is growing weed really hard? Well, things can get complicated. But, with a bit of dedication and having the correct information for the strain you grow, you can grow a cannabis plant with ease.
What are some of the pre-requirements? Growing your own cannabis plant would require you sacrificing extra minutes of your day in and day out and some space from your garden, balcony, or if are limited on space, why not your closet. What's the higher purpose of growing your own? To have your own professional-quality buds. A successful yield would really depend on how serious you are in this.
Providing the Resources
Like every other plant, in order to thrive and grow, cannabis also requires:
- Light – sunlight or grow lights, it’s essential to have quality yields and buds;
- Air – a well-ventilated space so your plant can have light windy air exchange;
- Temperature – if it’s too cold or hot for you, then probably it’s for your buds too;
- Nutrients – pre-formulated nutrients or self-composted soil, it’s all on you;
- Water – no need to mention how this is important. Overwatering, on the other hand, could be a problem.
Time Frame: How long does it take to grow cannabis?
Although weed can do magic for you, unfortunately, it can’t grow with super speed. Depending on the strain you grow, it will be ripe for yield anywhere between 7 to 10 weeks. For novice growers, in the beginning, it's best to stick with quick-finishing autoflowering seeds.
Growing indoors may entail a shorter grow period since it's you who controls the growing conditions. A common enough issue among impatient growers is their tendency to jump over some important steps concerning the light schedules or the soil's pH environment. But even then, you can get lucky and grow some okay weed, despite errors that may have an impact on yield output or the overall quality of the smokable flower. Which is a pity. If you are dedicating time to grow some weed on your own, it's probably in your best interest to nurture the best possible plants you can grow yourself and do everything in your knowledge to prevent making errors or growing plants that will eventually end up looking sickly.
The Growing Place
It’s on you to choose if that would be indoors or outdoors. You can start with indoors growing for the simple reason that you are controlling the environment. The more plants you are growing, the bigger the responsibility. The plants are 100% dependent on your care, so they can make it through the different growing stages and produce a lovable flower.
Always have in mind the temperature and humidity of the room where you are growing. The safe temperature range is between 70-85°F (20-30°C). It's good that this room or place is exposed to a sunny side as that would lower the chance of humid air or the appearance of mold, which cannabis really doesn't like. If the room you grow is not optimal in terms of temperature and humidity, you must do something to ventilate and warm the space to improve the conditions in which you grow cannabis. These are just some basic directions.
As you become more experienced, you will find out different strains can thrive and tolerate within different ranges of temperature and room humidity. Plus, there are various strategies you can undertake in this regard. On the other hand, growing outdoors is easier because it may save you finances. For instance, growing inside may require that you spend money on lights and ventilators.
When growing cannabis plants outdoors, be aware of possible unexpected guests: bugs and other animals, not forgetting your nosy neighbor Jane. But if you have good outdoor conditions, go ahead and use the benefits of the sunlight; that will do all the heavy cost work for you.
More Light, More Buds!
When you rely on the sun, keep in mind that your plants need at least eight hours of direct sunlight. Preferably from 10am-4pm because this is their best “working” schedule, and you can start with window positioning, so later you can store to a more suitable final location.
When it comes to household lighting, the choice is incredibly vast nowadays. Compact Fluorescent Light Bulbs (CFLs) & household LEDs are one of the many. They are mainly used for lighting up the rooms, they are cheap, and most importantly, they can do the job without being suspicious. Fluorescent Lighting (T5/T8) might even be better, but have in mind that these have a short light brightness range, so your plants need to be placed very close to them. LEC or Light Emitting Ceramic produces significant levels of UV light, and you can achieve surprisingly fast growth. Sadly, they are noisy as hell.
Metal Halide (MH) & High-Pressure Sodium (HPS) are very cheap to buy and set up, especially knowing how mighty they are, which might not work out well for your electricity bill. LED grow lights are the leader among fluorescent lighting, trendy for growing cannabis. The LED model is different, so when in doubt, check with the manufacturer about the needed distance and position from the plant.
Distance between cannabis plants and artificial lights is something you should pay attention to, as if you are using too strong lights too closer to the plant, you might end up burning or frying the tops of your plants. You need to be flexible with lights. As your plants grow, you have to figure out how to keep a distance between the hanging lamp. Between 12 and 24 inches distance is recommended for the vegetation stage. You can put them slightly closer when they begin to flower.
Soil and Nutrients
Be very careful about the food and water that you give to your plant. That is basically the growing medium, and you can choose between:
- Soil –the composted super soil is a great choice, but you can also buy soil from a store that is rich with nutrients for your first experiment.
- Soilless Mix – this is actually for hydroponic growing and includes coco coir, perlite, vermiculite, etc.
- Directly in Water / Hydroponics –excellent to combine with HID/LEC/LED grow lights for best results.
Testing the pH of your root environment can prevent any difficulties with nutrition. Say you grow in soil, the pH values should be between 5.9 and 6.5. You can quickly test the soil pH with simple pH strips that are really cheap. If the test indicates a different value than wanted, you will have to implement some strategies to improve the soil. In naturally composted soil, this question might require less attention because here, you already have a microbial colony living in the ground that will take care of the pH and hand-deliver the nutrients to the roots of your plants for you. In any other case, this should be a number one priority in order to supervise the proper nutritional absorption in both stages: vegetative and flowering. Check out this guide on nutrient deficiencies to learn how to spot common cannabis nutrient deficiencies.
What to Grow (Choosing the Strain)
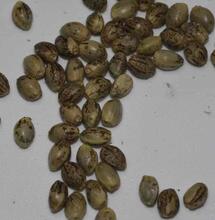
For experienced growers, this is easy-peasy. For others, it can be tricky upon discovering that a strain you thought was cool and would naturally fit your lifestyle takes one hell of guidelines and recommendations on how to grow it properly. And you're nowhere near ready to abide by all those rules. Start with simpler strains like Blueberry or any quick bud producing autoflowers, as earlier mentioned. Supply seeds online from a breeder or seed bank; just make sure that supplying seeds online would be legit in your part of the country. If you have a grower friend, you can supply seeds from them. And even better, they can give you first-hand tips on what to watch for when you start growing yourself.
The hard work is high-rewarding.
The Stage of Growth
Vegetative Stage
You get to this stage once you see your plants sprout visible leaves. This is the moment to decide if you need to add extra nutrients. If so, start with medium strength to give the plant the push to start growing vigorously. If you notice lower leaves turning first lime green, then yellow and slowly falling out, it could well be a sign that the plant does not have enough nutrients and you should consider giving full strength nutrients. In this stage, they need 18-24 hours/light a day.
Flowering Stage or Gender revealing party
Yes, this is the flowering stage and you can throw a gender revealing party because a week or two after you initiate the 12-12 light schedule (or naturally in the wild), your plants will reveal their gender! Not to spoil the party, but gender balance here is not welcomed because we need girl’s power!
The 12-12 light schedule refers to 12 hours of light & 12 hours of uninterrupted darkness each day (timer is welcomed here) to get your cannabis to start flowering (making buds). Only female plants are game because those are the ones that make buds. Male plants just make pollen sacs (balls) that cannot be used for smoking.
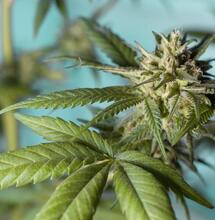
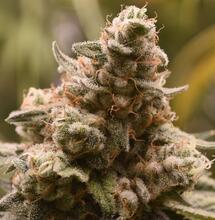
Nevertheless, if you accidentally grew male plants, here are some alternative ideas on how you can use this gender unwanted plant. You will recognize the female plants by their feathery, white hairs at the tops of branch joints. You know that these girls are gonna turn into great weed material if you see the calyxes growing on top of each other to make buds, each with white hair. For best results in the flowering stage, the plants need cooler space (64-78°F/ 18-26°C) to produce buds with the best color, trichome production and smell.
The Harvest
You will know when it’s time for harvest by the smell. But, take your time until at least 40% of the white hairs have changed color (darkened) and are curling in. Starting to harvest at this point, your buds will have more of a speedy effect and are not at full potency. If you wait until 50-70% of the hairs to turn dark, you have the highest THC levels, and if you harvest when 80-90% of the hairs have darkened, you will have a weed with more a couchlock, medicinal effect, meaning that some of the THC transformed into a more relaxing cannabinoid type known as CBN.
Final touches
If you want your cannabis properly dried, hang the yield upside down in a cool dark place after you have cut off and trimmed. Once they're dry, preserve them so they remain smooth and retain their smell and taste. Store them in tightly closed, quart-sized mason jars in a cool dark place, and for the first 2 weeks, open the jars once a day for several seconds to get fresh air in your jars and release any moisture. Cannabis tends to be more potent if you preserve it for at least a month. When you are finally through with your first successful yield and after yield rituals, don't wait for anything else but roll your first personally grown joint and fly to the moon. If you did it, you certainly deserve it.

